Bathroom in an Unfinished Basement: Stop Moisture Before You Remodel
Adding a bathroom to an unfinished basement starts with moisture, not plumbing. Get the bathroom unfinished basement moisture questions answered first, because every dollar you spend on drywall, tile, and fixtures sits on top of whatever is coming through that slab and those walls. Before remodeling a bathroom in the basement, this guide walks you through the right order: dry out the space, decide between a gravity drain and an ejector pump, rough in the plumbing, then build. Skip a step and you risk tearing out a finished bathroom in two years to fix what a weekend of testing would have caught.
This matters double if you are finishing the basement to sell or rent. The National Association of Realtors Remodeling Impact Report found that 64% of basement finishing costs are recovered at sale, one of the highest returns among 20 projects studied. A moldy bathroom flips that math fast. An inspector flags it, the buyer walks or renegotiates, and your margin disappears.
Step 1: Test for Basement Moisture Before Remodeling Your Bathroom
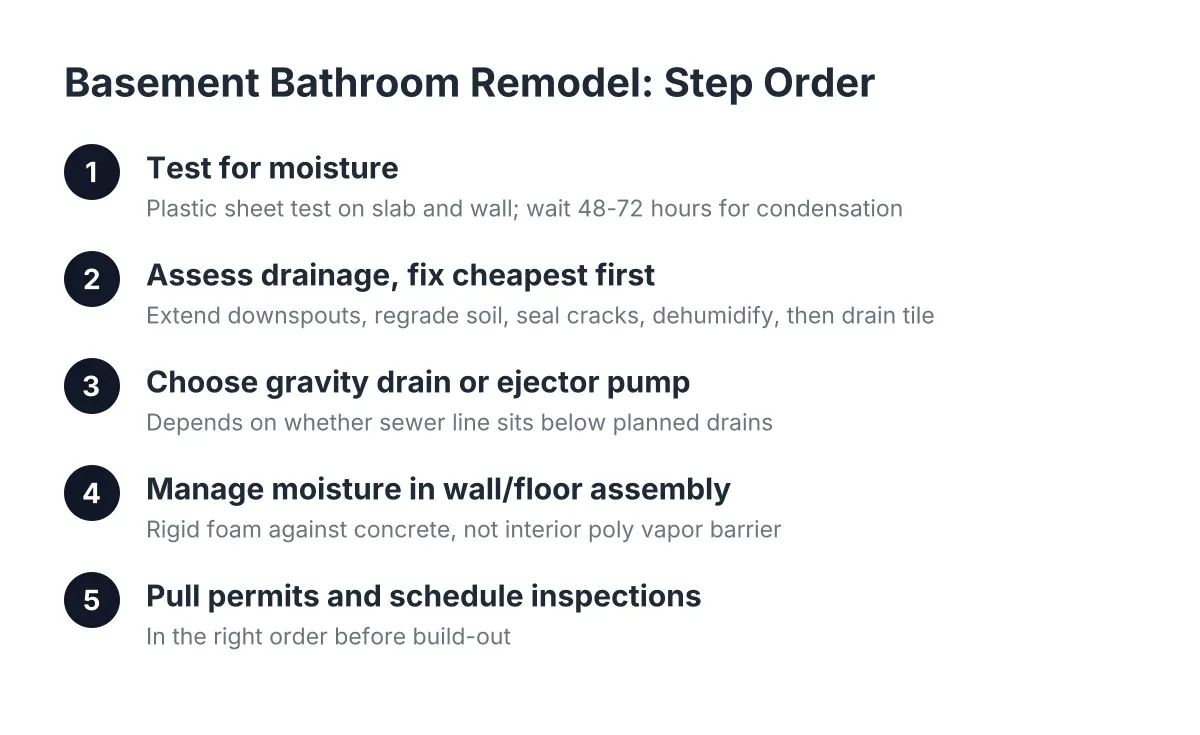
Test for moisture in the unfinished basement before you commit to a bathroom layout. The simplest check is the plastic sheet test: tape a two-foot square of clear plastic to the bare concrete floor and another to the foundation wall, seal all four edges, and wait 48 to 72 hours. Condensation on the underside means moisture is migrating up through the slab or through the wall.
Do this in more than one spot, and do it near the corner where you plan to put the bathroom. Minneapolis basements see heavy spring melt and humid summers, so a slab that tests dry in January can sweat in June. If you can, run the test in both seasons before finishing.
In addition, walk the exterior. Look for downspouts dumping water at the foundation, grading that slopes toward the house, and any white chalky residue (efflorescence) on interior block walls. Efflorescence is minerals left behind by water moving through the concrete, and it tells you vapor is pushing through even if the wall feels dry.
Step 2: Assess Basement Moisture and Fix Drainage Problems Before You Remodel
Fix the water problem before you insulate or frame a single wall. Insulating over basement moisture issues that remain unresolved traps water in the assembly, and framed walls can degrade fast once that happens. Most basement moisture is driven by vapor pressure pushing through porous concrete, so treatments that only cover the symptom, like a coat of waterproofing paint on a wet wall, tend to fail.
Work from cheapest fix to most expensive:
- Extend downspouts at least six feet from the foundation.
- Regrade soil so it slopes away from the house.
- Seal visible cracks in the slab and walls.
- Add a dehumidifier sized for the square footage and run it through summer.
- If water still enters, price interior drain tile and a sump pump before you finish anything.
For a flipper, this order protects your budget. Suppose you bought a 1950s Minneapolis rambler with a damp corner in the unfinished basement. Extending two downspouts and regrading one bed might cost a few hundred dollars and solve it. Interior drain tile might run several thousand. You only know which one you need after the cheap fixes and a rain event, so give yourself that time before the remodel clock starts.
Step 3: Choose Gravity Drain or Ejector Pump
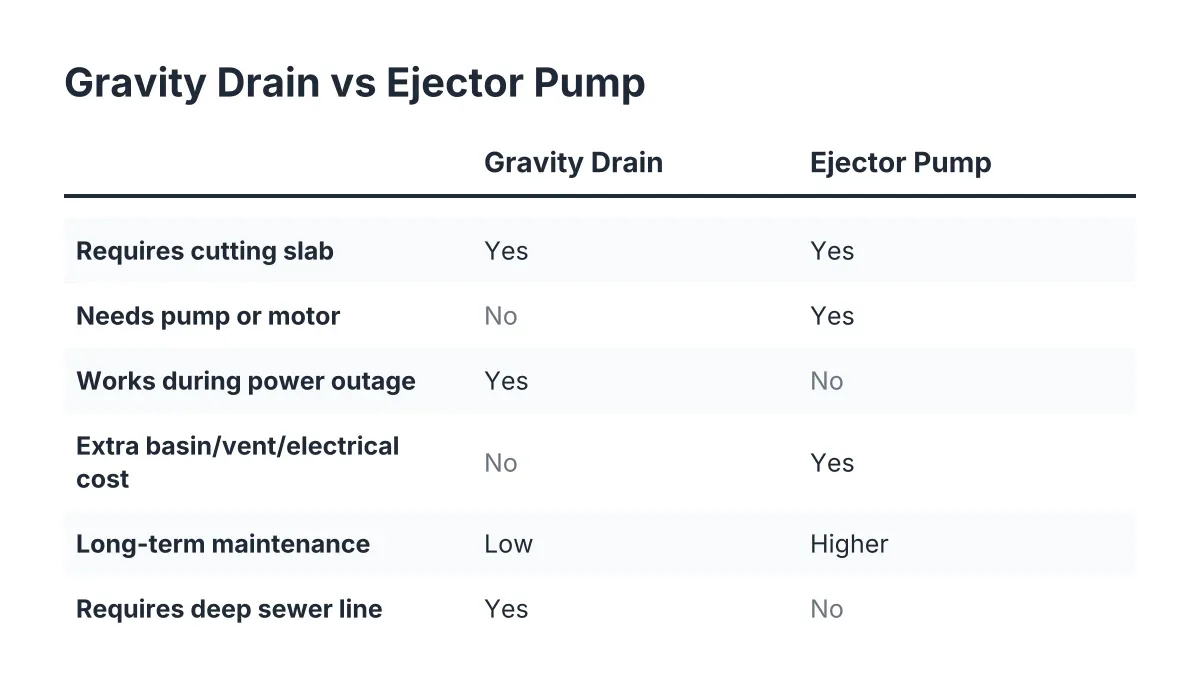
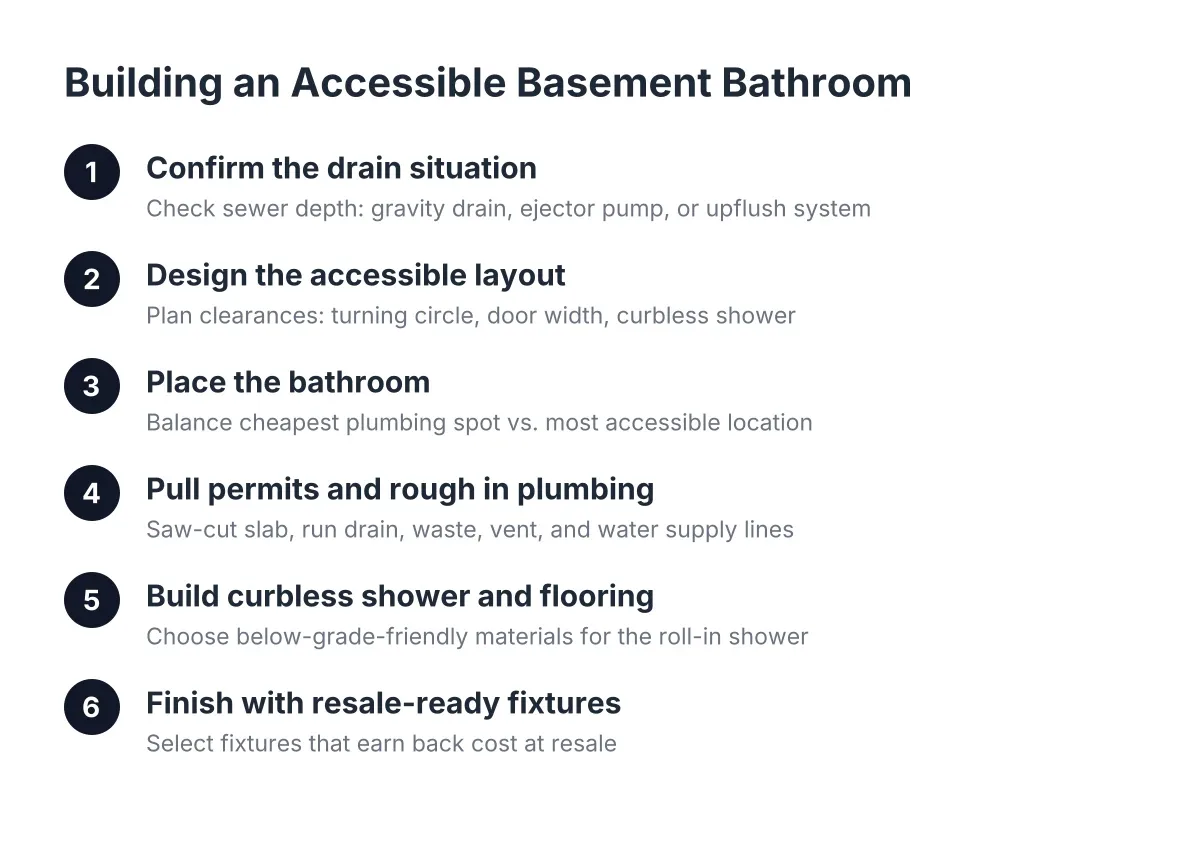
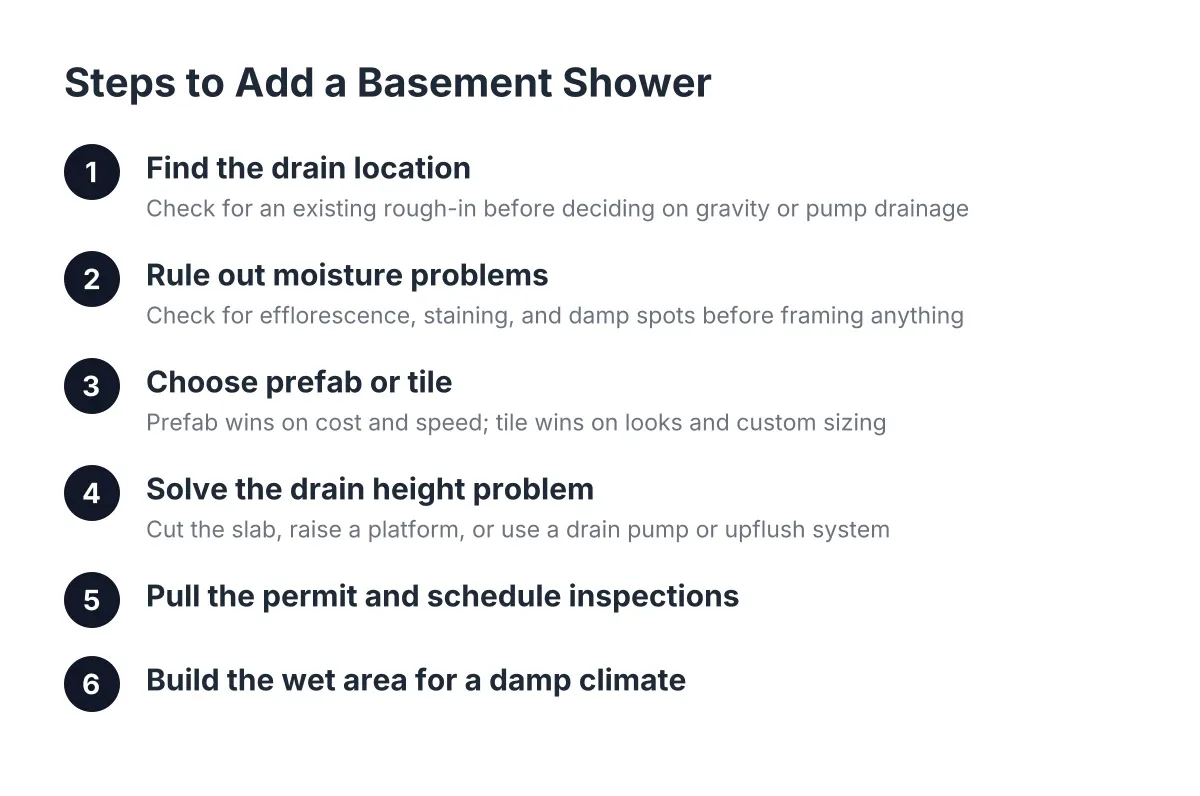
The core plumbing decision for a basement bathroom is whether your sewer line is deep enough for a gravity drain. Find the main drain line where it exits the basement. If the sewer line sits below the level of your planned shower and toilet drains, waste can flow out by gravity, and that is the cheaper, simpler, lower-maintenance option. If the sewer line exits higher, you need an ejector pump system: a sealed pit in the slab, a pump, and a vented basin that lifts waste up to the main line.
Here is the honest tradeoff. Gravity costs less to install and has no moving parts to fail. However, it still requires breaking the slab to run new drain lines unless your home already has a rough-in. An ejector pump adds the cost of the basin, pump, and electrical circuit, plus a pump that will eventually need replacement. Upflush toilet systems are a third option that avoids breaking concrete, but they limit your layout, and many buyers and inspectors view them as a compromise, which matters if resale is the goal.
Some Minneapolis homes, especially those built after the 1970s, have a capped rough-in already stubbed into the slab. If you see capped pipes sticking out of the concrete in a basement corner, you may have inherited the most expensive part of the job. A plumber can scope the lines to confirm depth and condition before you plan around them.
A bathroom plumbing diagram with measurements is worth sketching at this stage. Mark the distance from the main stack to each fixture, the slope of the drain runs (a quarter inch per foot is the standard target), and the vent path. That sketch keeps your layout honest and gives any contractor an exact picture to bid against, which protects you from estimate padding.
Step 4: Manage Basement Moisture in Your Finished Bathroom Assembly
A basement bathroom adds its own moisture on top of what the ground pushes in, so the wall and floor assemblies have to handle both. When you are managing basement moisture before remodeling a bathroom, the wall and floor design either protects your investment or sets up mold behind the tile. The wall needs protection in two directions: warm, humid bathroom air must not condense on cold concrete, and soil moisture must not wick into the framing.
Avoid the most common mistake here. Do not staple poly sheeting over the inside of the stud wall in a basement bathroom. An interior vapor barrier traps moisture in the cavity, because water that gets in through air leaks or minor seepage has no way to dry back into the room. The better assembly puts rigid foam against the concrete, frames in front of it, and keeps the cavity able to dry inward. Airtightness matters more than the vapor barrier itself; air leaking into a wall cavity carries far more moisture than vapor diffusing through materials.
On the floor, a subfloor system raised slightly off the slab on a dimpled membrane gives any vapor under the floor a path to dry out instead of soaking into your flooring. Even if your slab has a vapor barrier underneath, which blocks ground moisture from entering the concrete according to W. R. Meadows, a subfloor adds cheap insurance for the finished space. Skip carpet in the bathroom and anywhere near it; use tile or vinyl plank rated for below-grade installation.
Finally, plan ventilation as a requirement, not an option. A basement bathroom needs an exhaust fan ducted to the outside, not into a joist bay or the attic. Undersized or missing exhaust is the fastest way to turn a dry basement into a humid one.
Step 5: Pull Permits and Schedule Inspections in the Right Order
Permits protect your resale value, so treat them as part of the moisture plan. In Minneapolis, a basement bathroom addition needs plumbing, electrical, and building permits, and inspectors will look at the rough-in before you close up walls. As of 2026, unpermitted bathroom work is a common deal-killer at sale; an appraiser may not count the bathroom at all, and a buyer's inspector will flag it.
The inspection sequence also happens to match good moisture practice. Rough plumbing gets inspected with the slab open, framing and insulation get inspected before drywall, and that means a second set of eyes checks your wall assembly before it is hidden. For a flipper, the permit file is a selling document; it shows the next buyer the basement bathroom remodeling was done right, which supports a stronger price.
One honest limitation: if your moisture testing shows active water intrusion, standing water after rain, or a high water table, bring in a professional before you design anything. Drain tile, sump systems, and exterior waterproofing are not DIY territory, and a basement bathroom built over an unsolved water problem is money buried in concrete.
What This Means for Your Budget and Return
Moisture work changes the numbers, so run them before you commit. Angi puts an average basement remodel at $30 to $75 per square foot, and the bathroom corner of that range runs high because of plumbing. A gravity-drain bathroom over a dry slab sits at the low end of bathroom costs. Add an ejector pump, drain tile, and a subfloor system, and you can add several thousand dollars before a single fixture goes in.
That is not a reason to skip the bathroom. Returns on basement finishing vary widely by market, from 23% to 86% according to Zonda, and a legal, permitted, dry bathroom is one of the features that pushes a finished basement toward the high end of that range. The sequence in this guide exists so the money lands in value a buyer or appraiser can see, not in repairs they never will.
Handle the basement moisture work before remodeling, pick the drain strategy your sewer depth actually supports, and build an assembly that can dry. Do those three things in order and the rest of the remodel is ordinary construction.
If you need basement finishing, Minneapolis Basement Finishing Pros can help.
Prefer to talk it through? Call (651) 758-8806 — a quick call is usually the fastest way to get a straight answer for your situation.