Basement Bathroom Plumbing Rough-In: Drains, Ejector Pumps, and Code in Minneapolis
Adding a bathroom below grade sounds simple until you look at where the water has to go. The basement bathroom plumbing rough-in is the part of the project that decides everything else: your layout, your budget, and whether the job passes inspection the first time. When a basement bathroom needs to drain upward to reach the sewer line, you'll rely on a basement bathroom ejector pump to move waste against gravity. Most of the choices come down to one question. Can your drains run downhill to the sewer line by gravity, or do you need a pump to push waste up? This guide walks through the rough-in step by step, in the order a Minneapolis contractor would actually work it, so you know what is under your slab before anyone breaks concrete.
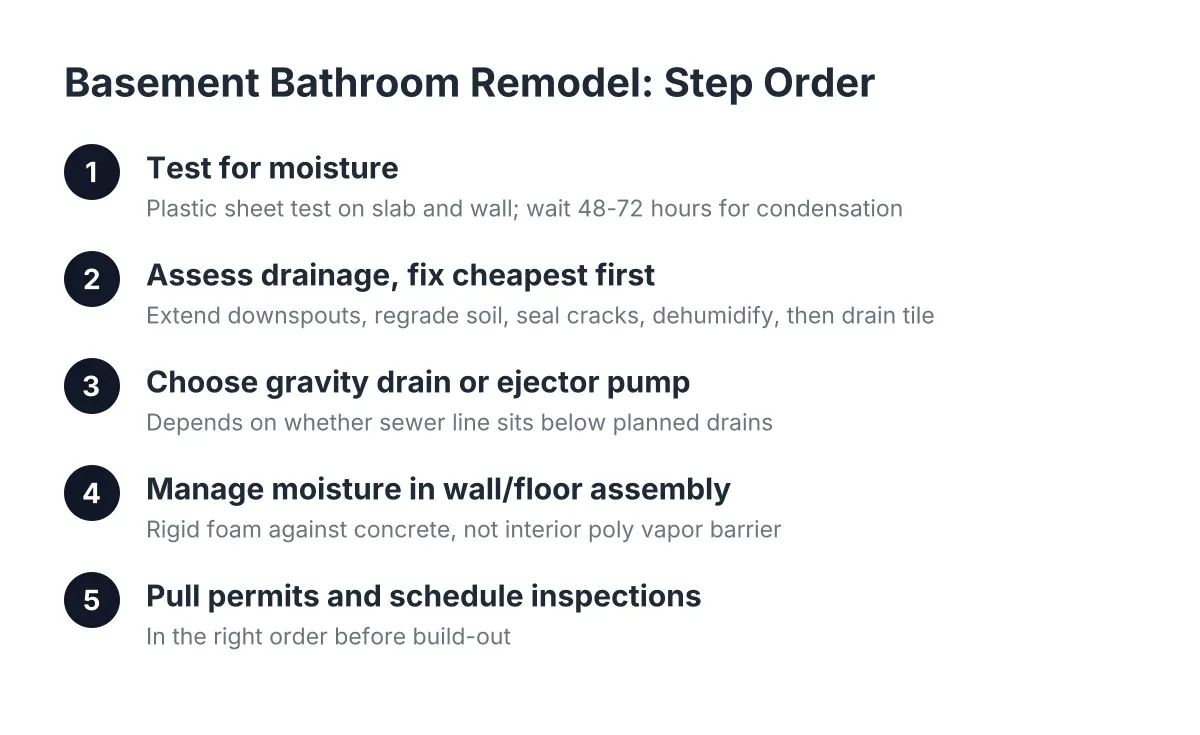
If you are the type who worries about inspections, that is a healthy instinct here. Plumbing that gets buried under new concrete is exactly the kind of work an inspector wants to see before it disappears. Skipping the permit on a basement bathroom is how homeowners end up tearing out a finished floor two years later during a pre-listing inspection.
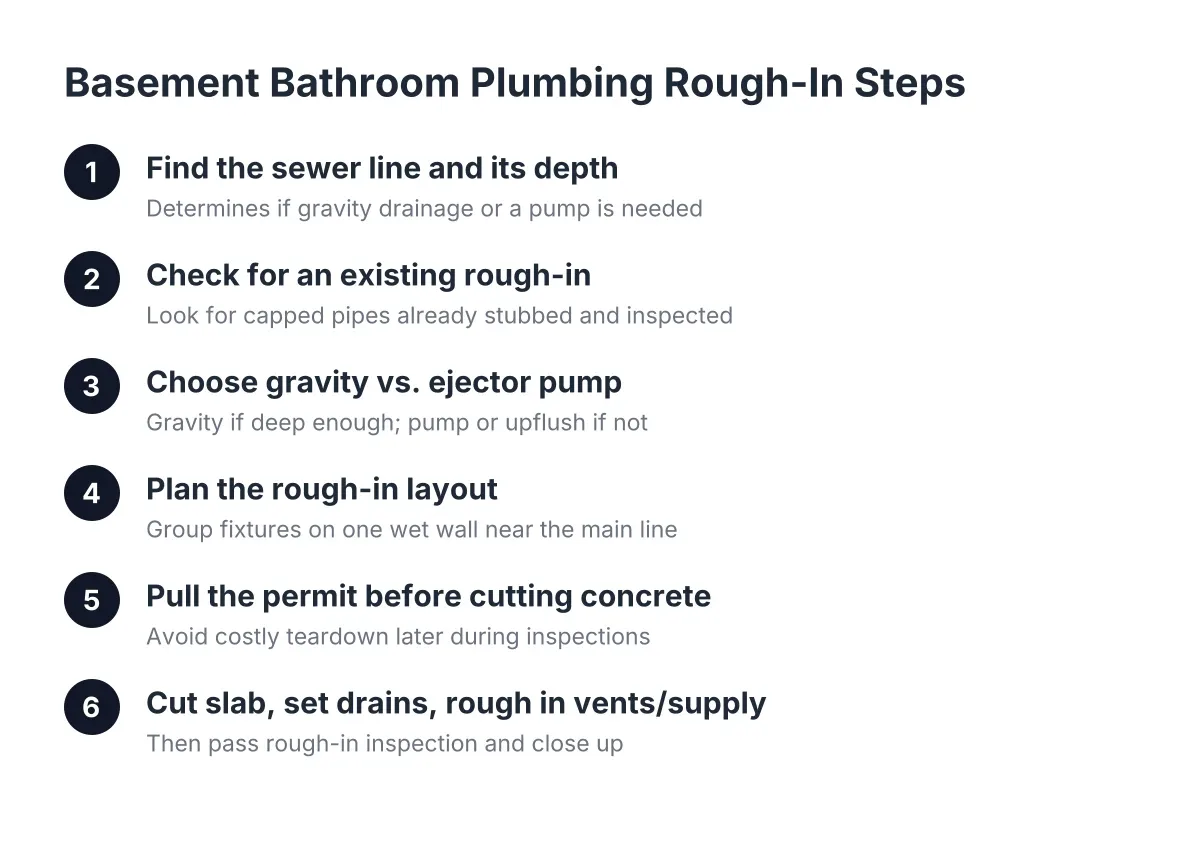
Step 1: Find Your Sewer Line and Measure Its Depth
Start by locating where the main sewer line exits your house and how deep it sits. This single measurement decides whether you get a gravity drain or a pump. In many Minneapolis homes, the main drain exits through the basement wall or floor. If it exits below the level of your basement slab, gravity is on the table. If it exits higher, waste from a new bathroom cannot flow downhill to reach it.
Look for the main cleanout, usually a capped fitting near the floor where the drain leaves the house. Older Minneapolis homes sometimes have a floor drain that ties into the main line, which is a useful clue about depth.
Therefore, before you sketch a single wall, get a plumber or contractor to confirm the depth of that line. Guessing wrong here is the most expensive mistake in the whole project.
Step 2: Check for an Existing Rough-In
Next, look for capped pipes sticking up through the slab, often grouped in one corner of the basement. Builders in newer homes sometimes install a basement bathroom rough-in during construction: a toilet drain, a sink drain, and a shower drain, all stubbed up and capped. If you have one, a large part of the under-slab work is already done and inspected.
However, do not assume an existing rough-in was placed well. A common problem is a toilet stub that sits too close to a foundation wall or an awkward distance from where you actually want the bathroom. Standard rough-in dimensions matter: a toilet drain typically needs about 12 inches from the finished wall to the center of the flange, with clear space on both sides. If the builder's stub forces a cramped layout, moving it may cost more than it saves.
No rough-in at all is common in older Minneapolis basements. That means cutting the slab, which is the subject of the next steps.
Step 3: Gravity Drainage vs. Basement Bathroom Ejector Pump Systems
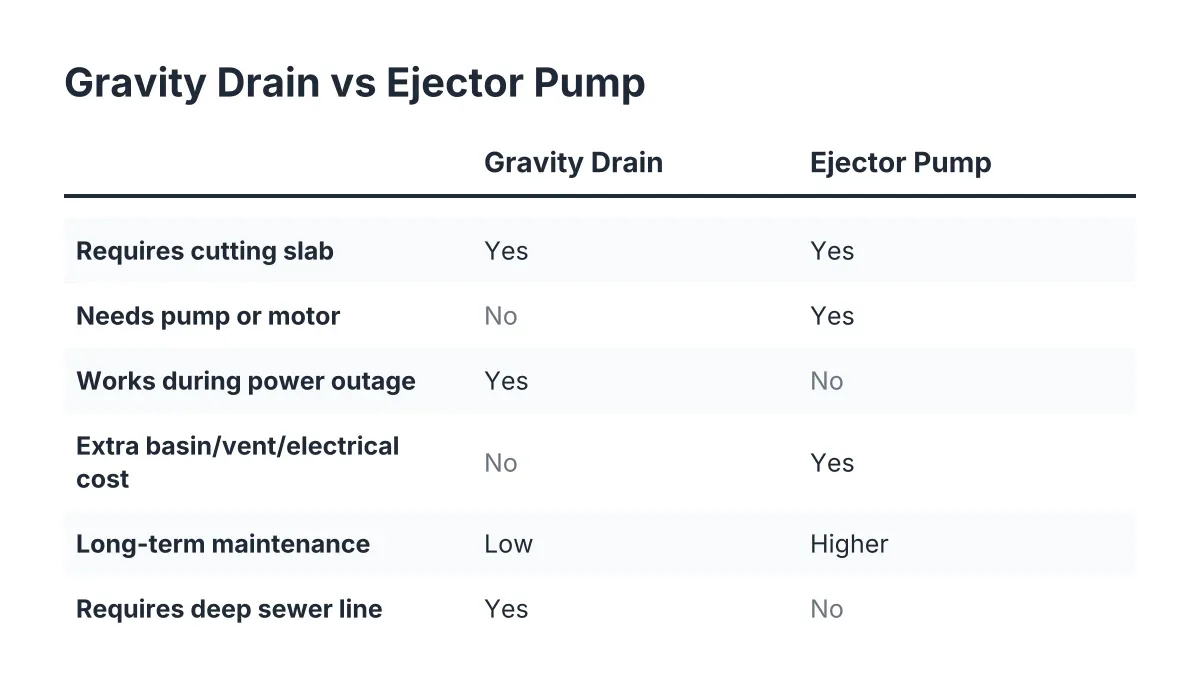
Here is the core tradeoff, and the honest answer is that neither option is free of downsides.
A gravity system works when the sewer line is deep enough. You cut a trench in the slab, slope new drain pipe at about a quarter inch per foot, and tie into the main line. Once it is buried, there is nothing to maintain and nothing to break. If gravity is available, take it.
A basement bathroom ejector pump system is the answer when the sewer line is too shallow. Waste from the toilet, sink, and shower flows into a sealed basin set into the floor. A pump inside the basin grinds and pushes the waste up to the main line. It works well, but understand what you are buying:
- The pump is a mechanical device. It will eventually need service or replacement, usually after years of use.
- The basin needs a sealed lid and its own vent to keep sewer gas out of the living space.
- During a power outage, the pump does not run, so the bathroom is out of service.
- You will hear it cycle. It is a low hum for a few seconds, not a disruption, but it exists.
Upflush toilet systems are a third option. These sit on top of the slab and pump waste through small-diameter pipe, so no concrete cutting is required. They cost less up front and can make sense for a half bath in a home you plan to sell soon. The tradeoffs are noise, a visible unit behind the toilet, and shower drains that must be raised on a platform. For a full bathroom you plan to use daily, most homeowners are happier with a proper below-slab rough-in.
Step 4: Plan the Basement Bathroom Plumbing Rough-In Layout
With the drainage method settled, lay out the room around the plumbing, not the other way around. A bathroom plumbing diagram for rough-in should show three drain locations and their measurements: the toilet flange, the sink drain in the wall, and the shower or tub drain. Keeping all three fixtures on one wet wall shortens the trench, simplifies venting, and cuts labor.
Placement rules worth planning around:
- Put the bathroom as close to the main drain line as the layout allows. Every extra foot of trench is money.
- Keep the toilet closest to the main line or the ejector basin. It carries the heaviest load.
- Leave a straight, accessible path for the vent to tie into the existing vent stack or run to the roof.
- If you are using an ejector basin, place it where the lid stays accessible. Never tile over it.
For example, suppose a homeowner in a 1950s Minneapolis rambler wants a bathroom in the far corner of the basement, 30 feet from the sewer line, with the furnace in between. In that scenario, moving the bathroom to the wall nearest the main stack could cut the trenching in half and avoid rerouting ductwork. That is the kind of layout decision that saves thousands before a saw ever touches concrete. Small bathroom renovation ideas like a corner shower or a wall-hung sink can help the room work in the tighter footprint near the stack.
This planning stage is also where basement bathroom remodeling and basement finishing decisions overlap. If you are finishing the rest of the basement, plan the bathroom rough-in before framing, so walls land where the plumbing needs them.
Step 5: Pull the Permit Before Cutting Concrete
Adding a bathroom to a basement requires a plumbing permit in Minneapolis, and the rough-in must be inspected before it is covered. This is not optional paperwork. The inspector checks pipe size, slope, venting, and connections while everything is still visible in the open trench. Once it passes, you pour concrete over it with confidence instead of doubt.
If you are worried about failing inspection, understand that the permit process protects you here. An unpermitted basement bathroom is a liability when you sell; buyers' inspectors look for exactly this, and disclosure rules in a 2026 sale will not let you hide it. Permitted, inspected work becomes a selling point instead of a red flag.
One honest caution: under-slab drain work, venting, and sewer connections are not good DIY territory, even for a handy homeowner. Framing and drywall in a basement are forgiving. Buried plumbing is not. Hire a licensed plumber for this phase.
Step 6: Cut the Slab and Set the Drains
Now the physical work starts. The crew saw-cuts the slab along the planned trench lines, breaks out the concrete, and digs to the depth needed for proper slope. Drain lines get assembled, sloped, and tied into the main line or run to the ejector basin. The toilet flange, sink drain, and shower drain get stubbed to their exact rough-in dimensions.
A detail that matters for longevity: the new pipe needs solid support in the trench so it cannot sag over time. Crews often pack material around and under the pipe, including broken pieces of the removed slab, so the drain holds its slope for decades. A sagging drain under concrete is a problem you cannot see and cannot easily fix.
Moisture also matters in a Minneapolis basement. According to W. R. Meadows, a vapor barrier placed over the base course under a concrete slab blocks moisture transmission from the ground into the concrete above. When the trench gets patched, that barrier should be restored before the new concrete goes in.
Step 7: Rough In the Vents and Water Supply
Every drain needs a vent, and this is where a lot of DIY basement bathroom plumbing rough-in attempts fail inspection. Vents let air into the drain system so traps hold water and sewer gas stays out of the house. The new bathroom's vents must tie into the existing vent stack or run their own path up and out. An ejector basin needs its own vent too.
In addition, hot and cold supply lines get run to each fixture during this phase. Compared to the drains, supply lines are the easy part; they are small, flexible in routing, and pressurized rather than slope-dependent.
Plan the exhaust fan duct now as well, while walls and ceilings are open. A basement bathroom without proper ventilation feeds moisture into the one part of the house least able to shed it.
Step 8: Pass the Rough-In Inspection, Then Close It Up
Call for the plumbing rough-in inspection before anything gets covered. The inspector verifies slope, pipe size, venting, and the sewer connection while the trench is open. Only after approval does the trench get backfilled and the slab patched with new concrete.
From there, the project moves to framing, the electrical rough-in with its own inspection, insulation inspection, drywall, flooring, and fixtures. The plumbing rough-in is the foundation all of that sits on, which is why it comes first and gets inspected hardest.
What This Adds Up To
A basement bathroom is one of the highest-value additions you can make to a finished basement. The National Association of Realtors Remodeling Impact Report found that 64% of basement finishing costs are recovered at sale, one of the highest recovery rates among 20 projects studied, and homeowners rated the result a 9.5 out of 10 joy score. That value only holds if the work under the slab is done right and documented with permits.
The short version: measure your sewer depth first, take gravity if you can get it, accept the ejector pump tradeoffs if you cannot, and never let anyone pour concrete over drains an inspector has not seen. Get those four things right and the rest of the bathroom is just finish work.
If you need basement finishing, Minneapolis Basement Finishing Pros can help.
Prefer to talk it through? Call (651) 758-8806 — a quick call is usually the fastest way to get a straight answer for your situation.