Concrete Epoxy Flooring Installation in a Basement: A Step-by-Step Guide for Wet Slabs
If your Minneapolis basement smells musty every spring, you have probably wondered whether any flooring can survive down there. Concrete epoxy flooring installation is one of the few options that works with a damp slab instead of fighting it. Done right, a cured epoxy coating seals the concrete itself, so moisture and soil gas have a much harder time reaching your finished space. Done wrong, it peels in sheets within a year. This guide walks through the process step by step, with the moisture checks that matter when installing epoxy flooring in a wet basement, so you know what a proper job looks like before you hire anyone or open a bucket.
One thing worth saying up front: most of the how-to content online covers garage floors. A basement is a different animal. A garage slab dries to open air on both ends of the season. Additionally, a basement slab sits below grade, surrounded by soil that stays wet from snowmelt into June. That changes the prep, the product choice, and the order of operations.
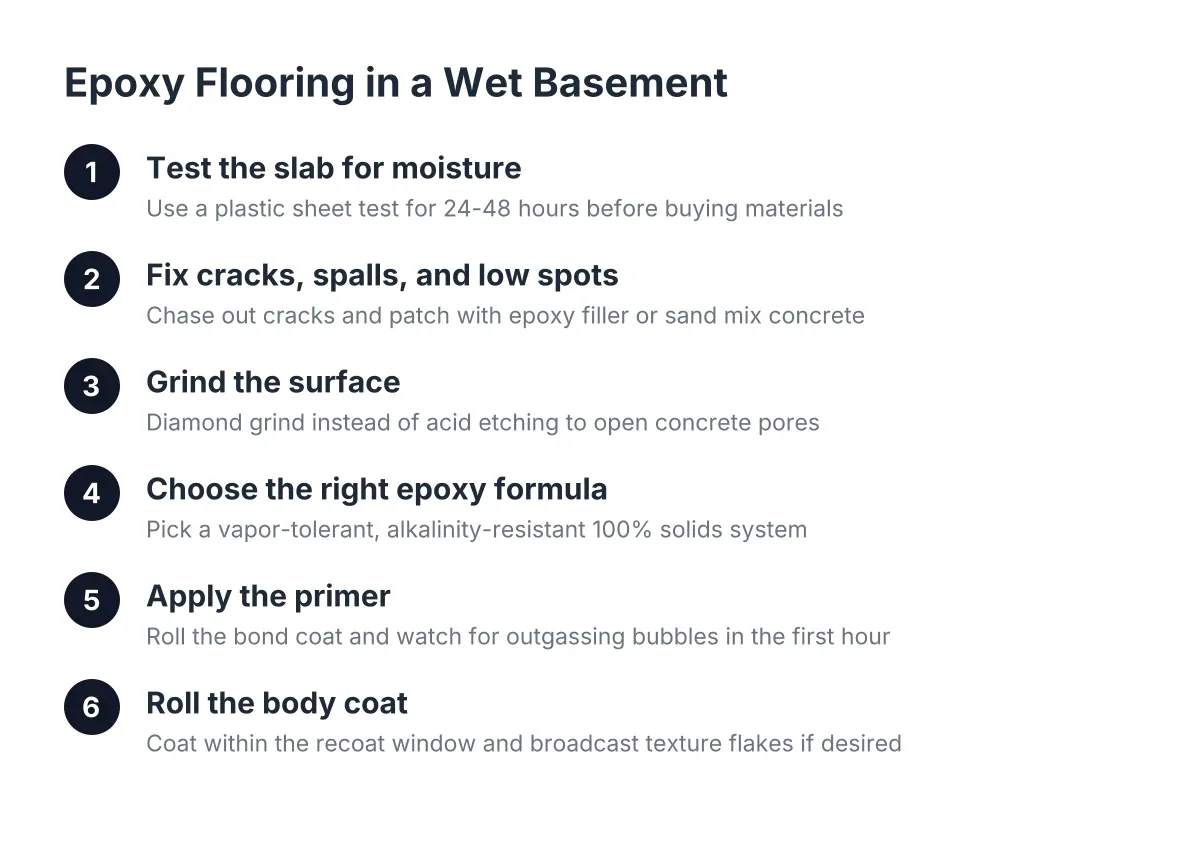
Step 1: Test the Slab for Moisture Before You Buy Anything
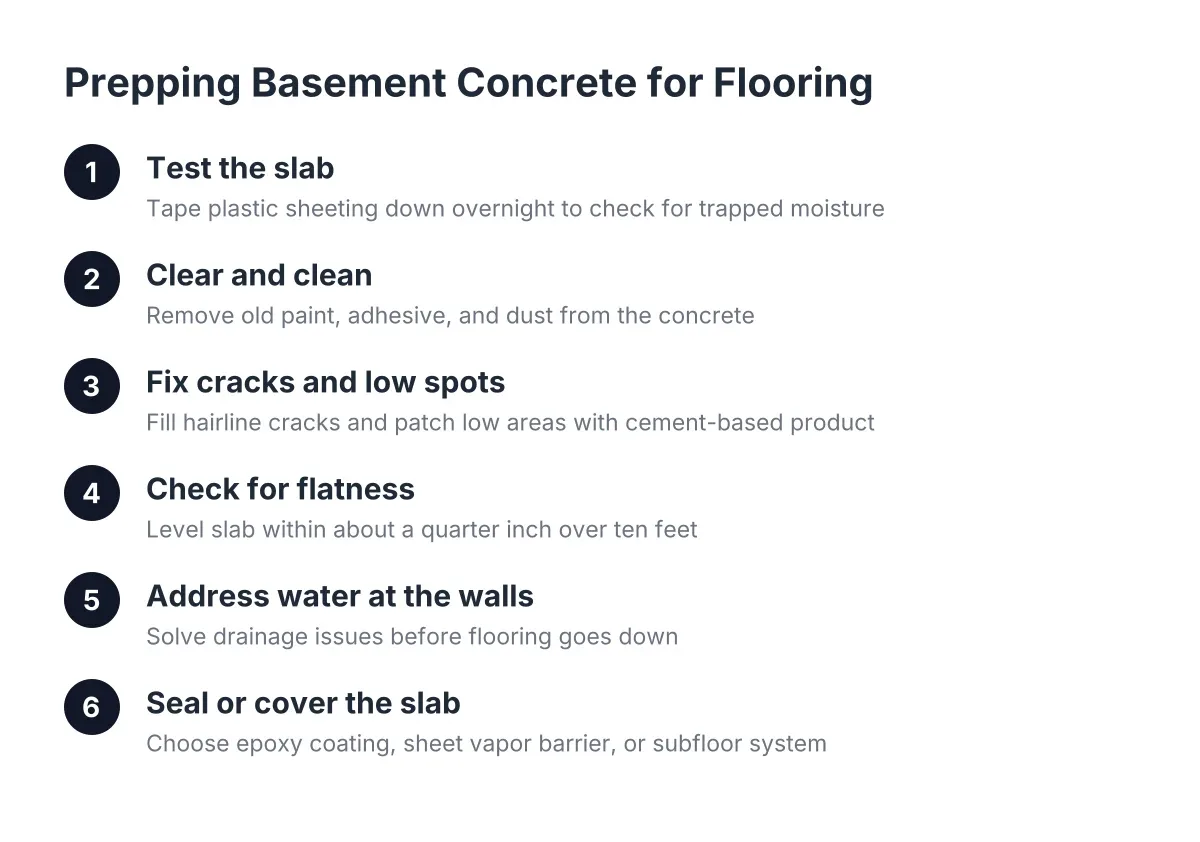
Start with a moisture test, because epoxy fails from below, not above. The simplest version is the plastic sheet test. Tape a two-foot square of clear plastic to the slab, seal all four edges with tape, and leave it for 24 to 48 hours. If you find condensation or a dark damp spot underneath, moisture is moving up through the concrete.
Some moisture vapor is normal for a below-grade slab. Standing water, active seepage at the wall-floor joint, or efflorescence (that white chalky powder on the foundation) is not. Those are drainage problems, and no coating fixes drainage.
Here is the decision rule that matters: when wall drainage is handled and moisture at the slab is minimal, a fluid-applied epoxy coating made for concrete can seal the slab. If the test shows heavy vapor or you see seepage after rain, fix the water path first. That might mean grading, gutters, and downspout extensions outside, or interior drainage in worse cases. A finishing contractor who skips this step is setting you up to pay twice.
Step 2: Fix Cracks, Spalls, and Low Spots
Next, patch the slab. Epoxy is a coating, not a filler, and it will telegraph every divot and crack underneath it. Chase out cracks with a grinder or chisel so the patch has something to grip, then fill them with an epoxy crack filler or a cement-based patch.
For larger patches, sand mix concrete gives you a smoother, more finished surface than standard concrete mix with coarse aggregate. That matters here. A properly leveled, smoothly finished patch means you skip self-leveling compound entirely, which saves a day and a material cost.
One prep shortcut that works: if the slab is getting diamond ground before coating anyway, a fine trowel finish on new patches is wasted effort. The grinder flattens everything in the next step regardless.
Step 3: Grind the Surface, Do Not Just Acid Etch It
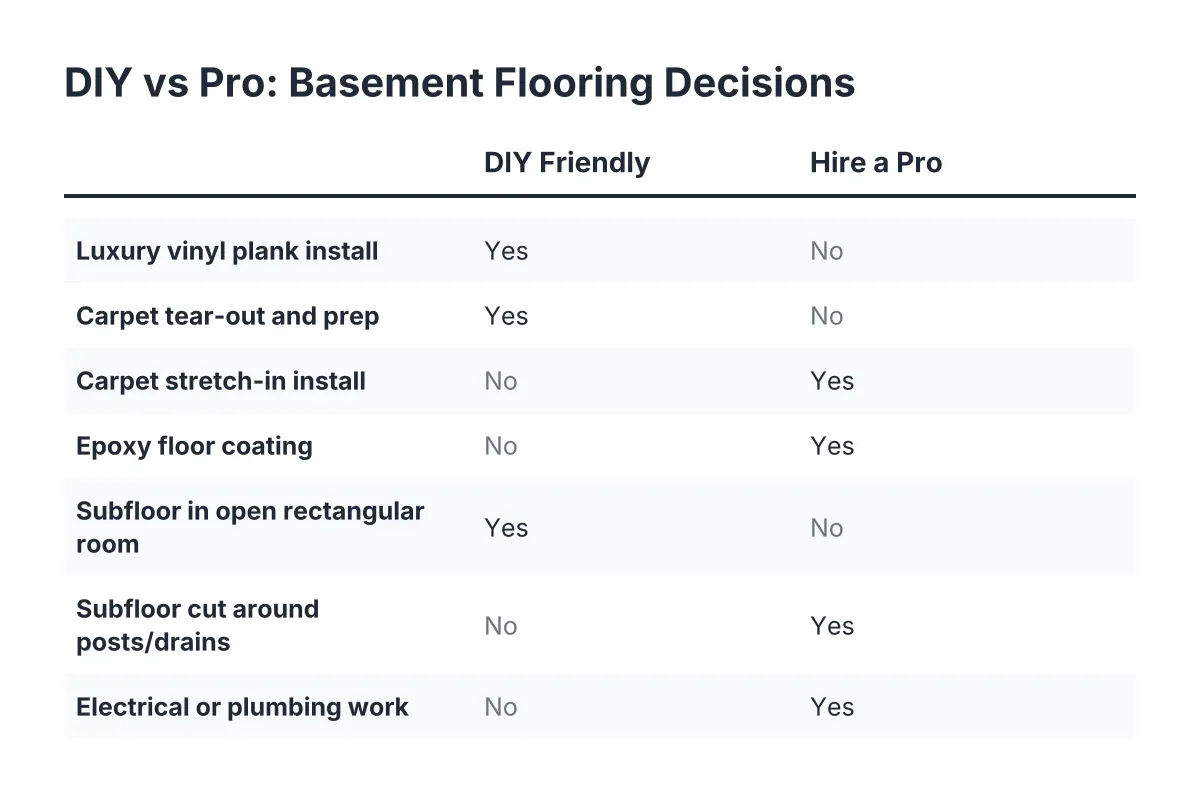
Mechanical grinding is the step that separates a floor that lasts from epoxy floor paint that peels. Rent a walk-behind diamond grinder, or hire this out. Grinding opens the pores of the concrete so the epoxy can bite, and it removes old sealers, paint, glue from previous basement flooring, and laitance from the original pour.
Acid etching is the shortcut most DIY kits recommend. In a basement it is a bad trade. Etching leaves residue, requires heavy rinsing (adding water to the exact room you are trying to keep dry), and does not remove old coatings at all.
After grinding, vacuum the entire slab twice with a shop vac. Dust left on the surface becomes a bond-breaker under the coating.
Step 4: Epoxy Flooring for Wet Basement Slabs—Choosing the Right Formula
Not every epoxy handles a basement. Two chemistry issues matter for concrete epoxy flooring installation below grade:
- Moisture vapor tolerance. Look for a 100 percent solids epoxy rated for moisture vapor, or a dedicated moisture-mitigating primer coat. Thin water-based epoxy floor paint from a hardware store kit is not built for a slab that breathes vapor year-round.
- Alkalinity resistance. Concrete is alkaline, and below-grade moisture carries that alkalinity to the surface. The formulation has to be selected so the concrete's alkalinity does not break down the coating from underneath.
- Working time and temperature. Epoxy cures slower in a 58-degree basement than the label's 70-degree assumption. Plan for longer cure windows, especially in a Minneapolis spring.
For example, suppose a landlord with a duplex wants a durable, mop-clean floor in a basement laundry and storage area between tenants. In that scenario, a two-coat 100 percent solids system with a vapor-tolerant primer costs more per gallon than a one-day kit, but it is the difference between a floor that survives ten tenant turnovers and one that blisters by the second summer.
Step 5: Apply the Primer and Watch the First Hour
Mix only what you can spread in the product's pot life, usually 30 to 40 minutes. Cut in the edges with a brush, then roll the field in overlapping passes with a 3/8-inch nap roller. The primer coat soaks into the ground concrete and becomes the bond layer everything else rides on.
Watch the primed surface for the first hour. Bubbles rising through the wet coating mean air or moisture is outgassing from the slab. A quick pass with a spiked roller or a torch knocks small bubbles down. Widespread bubbling means the slab is wetter than your test suggested, and you should stop and reassess rather than bury the problem under a topcoat.
Step 6: Roll the Body Coat and Broadcast Any Texture
Within the recoat window (check the label, typically 12 to 24 hours), roll the full-thickness body coat. Work in sections from the far corner toward the stairs so you never coat yourself into a corner. Keep a wet edge; a lap line in epoxy is permanent.
If you want texture, broadcast vinyl flakes or aluminum oxide grit into the wet coat. In a basement this is worth doing near laundry areas and the bottom of the stairs, where a smooth epoxy floor gets slick when wet. A clear topcoat locks the texture in.
Step 7: Let It Cure Longer Than the Label Says
Cure time is where cold basements punish impatience. Light foot traffic is usually fine in 24 hours at 70 degrees, but a Minneapolis basement in April runs 15 degrees cooler. Give it 48 hours before walking on it and a full week before moving furniture, appliances, or a workbench back in. Rushing this step leaves permanent dents and dull spots.
Why Epoxy Flooring in a Wet Basement Works Better Than Carpet or Wood
A properly cured epoxy coating does more than look clean. It acts as a monolithic vapor barrier, an air control layer, and a capillary break, all in one layer bonded directly to the slab. For a homeowner who has smelled must every spring and worried about what is growing under the old carpet, that is the real appeal. There is no carpet pad to soak up vapor, no wood subfloor to feed mold, and nothing organic touching the concrete.
There is also a practical layout use. Coating the floor of the utility room, even if the rest of the basement gets a subfloor and finished flooring, contains concrete dust so it does not migrate into the living space every time the door opens.
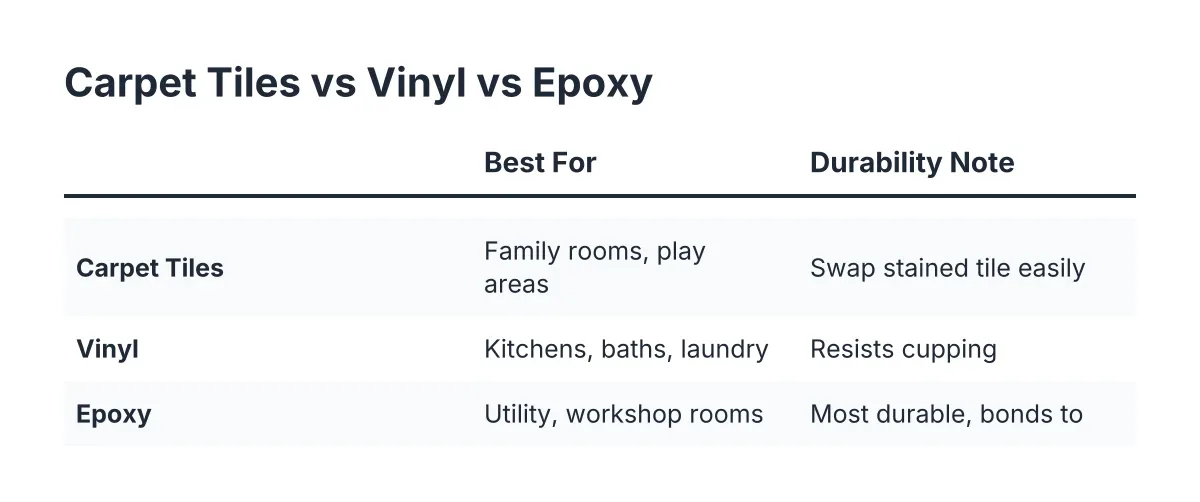
Epoxy has honest trade-offs, though. It is hard and cold underfoot, so it suits laundry rooms, workshops, gyms, and rental utility areas better than a family room where kids play on the floor. Many finished basements pair an epoxy-sealed mechanical room with vinyl basement flooring or carpet over a subfloor system in the living areas. Carpet costs less than premium plank products and cuts down echo in a big open basement room. And even a slab with a vapor barrier underneath can benefit from a subfloor system in living areas, as extra insurance against a future moisture event like a water heater failure.
When to Bring in a Pro Instead of a Rental Grinder
If your slab shows active seepage, wide cracks with vertical displacement, or heavy efflorescence, get a professional assessment before any coating goes down. The same goes for older slabs that may have no vapor barrier underneath at all; a vapor barrier under the slab exists to block ground moisture from entering the concrete, according to W. R. Meadows, and many older Minneapolis homes were poured without one. A contractor who knows local basements can test the slab, tell you honestly whether epoxy is the right call, and sequence the work so the flooring goes in after the moisture question is answered, not before.
That order of operations is the whole game. Test first, fix the water, prep the concrete, then coat. Follow it and an epoxy floor in a formerly damp basement can outlast every other finish in the house.
If you need basement finishing, Minneapolis Basement Finishing Pros can help.
Prefer to talk it through? Call (651) 758-8806 — a quick call is usually the fastest way to get a straight answer for your situation.