Is Basement Moisture Waterproofing Necessary Before You Finish? A Minneapolis Guide
You have the budget number, the layout sketch, and maybe a home equity pre-approval sitting in your inbox. Before drywall goes up, one question decides whether that money is well spent: is basement moisture control necessary before you remodel? For most Minneapolis basements, the honest answer is that some level of moisture work is not optional. It is the foundation the whole project sits on. This guide walks through how to tell what your basement actually needs, what it costs relative to the rest of the job, and what happens when homeowners skip it. Understanding whether waterproofing before finishing your basement is necessary is the key to a successful remodel.
We will keep this practical. You are not researching whether to finish the basement anymore. You have decided. Now the job is to do it right the first time so the playroom, guest bedroom, or family room you build stays dry for the next twenty years.
Why Moisture Comes First in Every Basement Remodel
Concrete looks solid, but it behaves more like a stiff sponge. Basement walls and floors sit against soil that holds water, and vapor pressure pushes that moisture through the porous concrete toward the drier air inside your house. You cannot see it happening. You only see the results: musty smells, damp corners, white chalky stains on the block, or a rug that never feels dry.
Here is the problem for a remodel. Once you cover that concrete with insulation, framing, drywall, and flooring, moisture has nowhere to go. It collects inside the wall cavity where you cannot see it. Insulation gets wet and stops insulating. Framing lumber and drywall feed mold. A finished basement built over an unresolved moisture problem can degrade fast, and the repair means tearing out the finishes you just paid for.
Therefore the order of operations matters more in a basement than anywhere else in the house. Moisture and drainage get resolved first. Insulation and framing come second. Finishes come last. Any contractor who wants to frame walls before talking about water is skipping the step that protects everything else.
Minneapolis makes this worse than most markets. Our clay-heavy soils hold water against foundations. Spring snowmelt saturates the ground fast, sometimes over a few warm days in March. Summer humidity condenses on cool foundation walls. A basement that looks bone dry in January can show damp spots in April. One walkthrough in the wrong season tells you nothing.
How to Tell If Your Basement Needs Waterproofing Before Finishing
Whether waterproofing before finishing your basement is necessary depends on what your specific basement shows, not on a blanket rule. Some Minneapolis basements need only vapor management and a smart subfloor. Others need grading fixes, gutter work, or interior drainage before finishing makes sense. The signs below tell you which camp you are in.
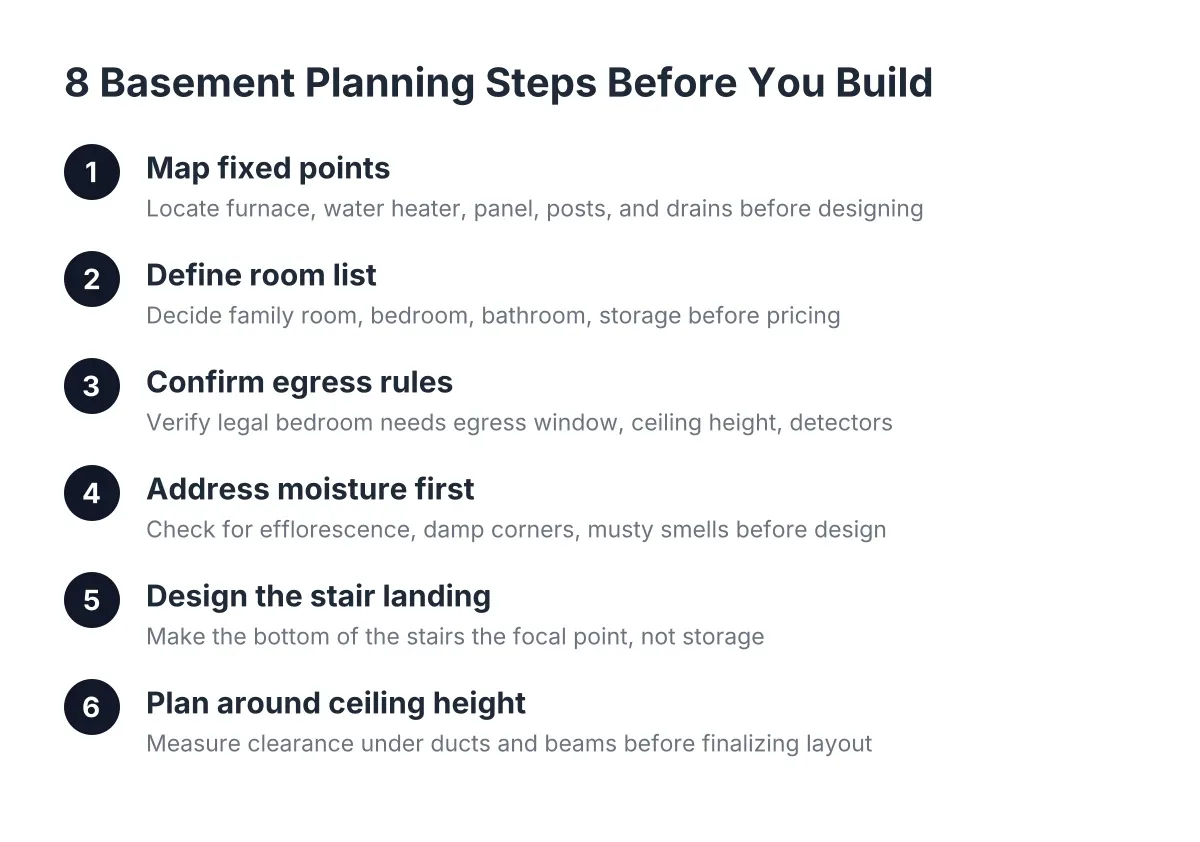
Start with a walkthrough. Do it after a heavy rain or during spring melt if you can. Look for these:
- Efflorescence. White, powdery mineral deposits on concrete walls. This means water has moved through the wall and evaporated, leaving salts behind.
- Damp spots or dark staining on the floor slab or lower portion of the walls, especially at corners and along the cove joint where wall meets floor.
- Musty smell that gets stronger in summer or after rain. Odor is often the first sign of hidden moisture.
- Rust on furnace legs, water heater bases, or shelving feet. Metal tells the truth about floor moisture over time.
- Peeling paint or bubbling on previously painted foundation walls. Vapor pressure pushes coatings off from behind.
- Visible cracks in walls or the slab, especially any crack that shows staining along its length.
- Standing water history. If the basement has ever taken on water, even once, treat that as your baseline condition, not a fluke.
Next, run a simple plastic sheet test. Tape a two-foot square of clear plastic to the bare concrete floor, sealing all four edges. Wait 48 hours. Condensation on the underside of the plastic means moisture is coming up through the slab. Condensation on top means humid indoor air is condensing on the cool concrete. Both matter, but they get fixed differently.
Finally, walk the outside of the house. Check whether soil slopes away from the foundation, whether downspouts dump water at least several feet from the wall, and whether gutters overflow in a hard rain. A large share of basement water problems trace back to roof water landing next to the foundation. Those fixes are cheap compared to interior drainage systems, and they should happen regardless of what else you do.
What Waterproofing Actually Means, and What Your Basement May Need
Waterproofing is a loose word that covers several different jobs. Sorting them out keeps you from paying for work you do not need, or skipping work you do. For a finishing project, the work falls into three tiers.
Tier 1: Water management outside the house
This is grading, gutters, downspout extensions, and sealing obvious exterior entry points like window wells. It is the least expensive tier and the first thing to correct. Suppose a homeowner in south Minneapolis finds one damp corner every spring. In that scenario, the fix might be a downspout extension and regraded soil on that side of the house, a few hundred dollars, not a full drainage system.
Tier 2: Vapor and condensation control inside
Even with zero liquid water, vapor still migrates through concrete. This tier includes the right insulation assembly on the walls, a vapor-aware subfloor over the slab, and dehumidification. For Minneapolis basements, effective wall insulation should carry a high R-value per inch, block air movement, and slow vapor so condensation cannot form against the cold concrete. Rigid foam against the foundation wall does all three. A fiberglass-and-poly assembly does not, and it is a common failure in older finished basements.
Under the slab, newer homes often have a vapor barrier already in place. According to W. R. Meadows, a vapor barrier under a concrete slab blocks moisture transmission from the ground into the concrete above. That helps, but it does not make a subfloor pointless. A raised or moisture-tolerant subfloor system protects the finished floor from future moisture events, including a water heater failure or a hundred-year rain. Think of it as insurance for the flooring budget.
Tier 3: Active water intrusion fixes
If water actually enters the basement, you are in this tier. Solutions include interior drain tile with a sump pump, crack injection, or exterior excavation and membrane work in severe cases. This is the expensive tier, and it is also the one where treating symptoms fails. Coatings and sealants applied to a wall that has vapor pressure pushing water through it tend to peel and fail, because they never address why the water is moving. If your basement is in this tier, resolve it fully before any finishing money gets spent.
Most Minneapolis basements land in Tier 1 or Tier 2. Only a minority need Tier 3 work. However, you want to know which tier you are in before you sign a finishing contract, not after the drywall is hung.
What Moisture Work Adds to Basement Remodeling Cost
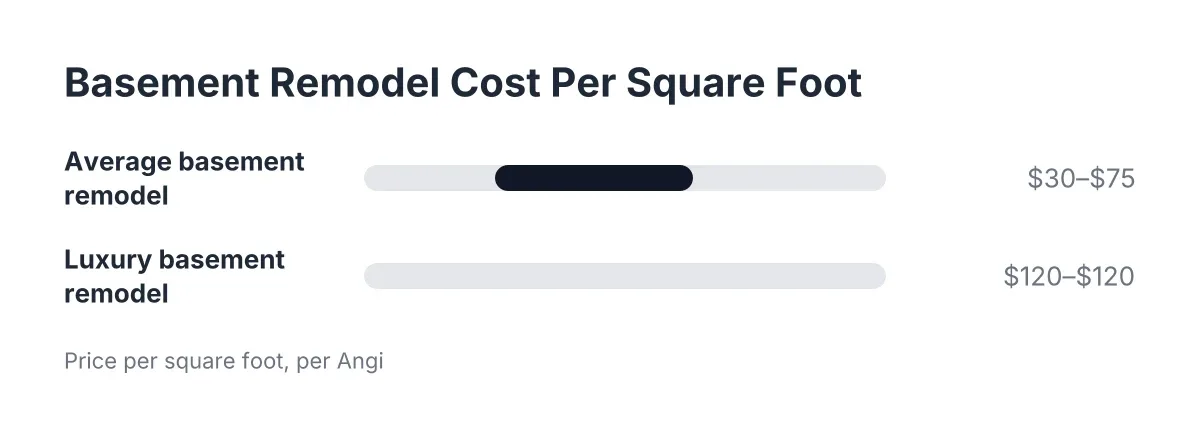
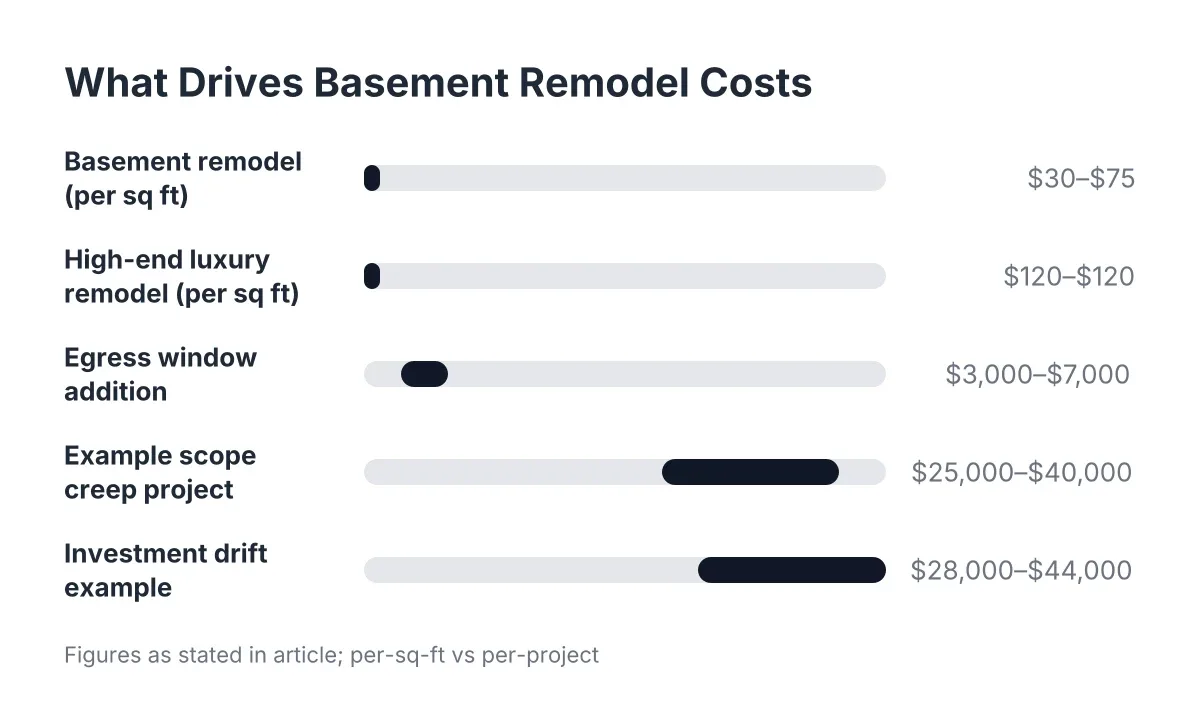
Moisture work is usually a small slice of the total budget, and it protects the rest. According to Angi, an average basement remodel runs $30 to $75 per square foot, with high-end projects exceeding $120. On a 900-square-foot Minneapolis basement, that puts the full project in a wide but realistic range. Tier 1 exterior fixes often cost a few hundred to a couple thousand dollars. Tier 2 vapor control is mostly baked into a proper insulation and subfloor spec, adding a modest premium over the cheapest possible assembly. Additionally, tier 3 interior drain tile and a sump system is the big-ticket item, and as an illustrative estimate, it can run several thousand to over ten thousand dollars depending on the footprint.
That sounds like a lot until you price the alternative. Tearing out moldy drywall, wet insulation, and buckled flooring, then rebuilding, costs more than doing the moisture work once. It also means living through construction twice, which matters when you have kids doing homework upstairs. Building moisture work into your basement remodeling cost from day one is cheaper than paying for the remodel and then paying for the rescue.
There is a return-on-investment angle too. The National Association of Realtors Remodeling Impact Report found that 64% of basement finishing costs are recovered at sale, one of the highest recovery rates among 20 projects studied. A basement with a documented moisture history and visible damage recovers far less. Dry space is what buyers, and appraisers, are paying for. That said, the stronger argument is daily use: the same NAR report gave basement finishing a joy score of 9.5 out of 10 from homeowners, and nobody enjoys a room that smells like a tent.
A Realistic Minneapolis Scenario: Budgeting Waterproofing Before Finishing
Say a family in Minneapolis has an 850-square-foot unfinished basement in a 1950s house. They want a family room, a small fourth bedroom, and a half bath. Their walkthrough finds efflorescence on the north wall, a musty smell in July, and downspouts that end right at the foundation. The plastic sheet test shows moisture rising through the slab.
In that scenario, a reasonable plan looks like this:
- Fix the exterior first. Extend downspouts and regrade the north side. Low cost, high impact.
- Spec the wall assembly for vapor. Rigid foam against the concrete, then framing, insulation, and drywall. No poly sheeting stapled to the interior side of the studs; an interior vapor barrier traps moisture in the cavity where it cannot dry.
- Add a subfloor system over the slab before flooring goes down, so the finished floor rides above any slab moisture.
- Install a dehumidifier sized for the space, ideally one that drains automatically.
- Re-test after the exterior fixes. If the north wall stays dry through a spring melt, they likely avoided a drain tile system entirely.
Total moisture-related cost in that hypothetical: a small fraction of the project, front-loaded, and invisible in the finished room. That is the point. Good moisture work disappears into walls and floors you never think about again.
One trade-off worth naming: if the walkthrough had found active water pooling on the floor each spring, the smart move might be to fix drainage this year and delay the finishing work a season. Waiting is frustrating when your family is bursting at the seams upstairs. It still beats finishing over an active leak.
Flooring Choices That Work with Waterproofing Before Finishing Your Basement
Flooring is where moisture decisions become visible, and it is where a lot of homeowners searching for basement renovation near me get conflicting advice. The rule is simple: every basement floor should assume some moisture exposure over its life, even in a dry basement. Choosing the right materials when waterproofing before finishing a basement ensures your investment lasts.
Luxury vinyl plank handles basement conditions well and looks like wood. Carpet works over a proper subfloor, and carpet tiles let you replace a wet section instead of the whole room. Solid hardwood does not belong on a below-grade slab; it cups and gaps as slab moisture cycles.
What about coatings? Basement floor paint and epoxy basement floor systems have a legitimate place, mostly in utility areas, workshops, and laundry zones that stay unfinished. A quality epoxy basement floor holds up to traffic and cleans easily. However, neither paint nor epoxy is a waterproofing fix. Vapor pushing up through the slab will blister and peel a coating from below, which is why prep and a moisture test matter before anyone rolls a coat. If your plastic sheet test showed slab moisture, address that first or choose a coating rated for it. For the finished living areas, a subfloor plus finished flooring beats a coated slab for warmth and comfort anyway; a bare painted slab reads cold underfoot ten months a year in Minnesota.
When to Bring in a Professional Before Finishing
Bring in a professional when your basement shows active water entry, wide or growing foundation cracks, a failed or missing sump system, or moisture signs you cannot trace to an obvious exterior cause. Those conditions need diagnosis, not guesswork, and the fix chosen affects everything built after it. A homeowner walkthrough finds the symptoms; a pro identifies the source.
There is one more situation that calls for outside eyes: a basement that was partially finished by a previous owner. If framed walls with fiberglass insulation sit directly against the concrete, the safer path is often tearing that assembly out and starting fresh rather than building on top of it. You do not know what two decades of vapor have done inside those cavities until they are open. Budget for demolition in that case, and treat whatever you find as useful information rather than bad luck.
Permits and inspections tie into this too. In Minneapolis, a legitimate finishing project gets inspected in stages, typically including an electrical rough-in inspection and a later insulation inspection before drywall closes things up. Those inspections are your protection. An inspector looking at your insulation assembly before it gets covered is one more check that the moisture strategy is sound. A contractor who suggests skipping permits is also skipping the inspections that would catch a bad wall assembly while it is still fixable.
The Bottom Line on Moisture Before You Finish
So, is basement moisture waterproofing necessary before a remodel? Necessary, yes; identical for every house, no. Every Minneapolis basement needs a moisture evaluation and a vapor-smart assembly. Only some need drainage systems or exterior excavation. The walkthrough, the plastic sheet test, and a hard look at your gutters and grading tell you which one you own.
Here is the short version to carry into your project as you plan for 2026:
- Evaluate moisture before you sign a finishing contract, ideally across a wet season.
- Fix exterior water management first; it is the cheapest tier and often the whole answer.
- Insulate with materials that block air and slow vapor; never trap moisture behind interior poly.
- Put a subfloor between the slab and your finished flooring, even over an existing vapor barrier.
- Resolve any active water intrusion completely before finishing money gets spent, even if that delays the fun part.
Do those five things in order, and the bedroom, playroom, or family room you build downstairs will feel like it was always part of the house. Skip them, and the basement will eventually remind you why they mattered. Moisture work is the least visible line item in the budget and the one that protects every other dollar you spend.
If you need basement finishing, Minneapolis Basement Finishing Pros can help.
Prefer to talk it through? Call (651) 758-8806 — a quick call is usually the fastest way to get a straight answer for your situation.