Basement Waterproofing Before Finishing: Moisture Tests Every Minneapolis Home Needs
If you finish a damp basement, you finish it twice. That is the hard truth about basement waterproofing, and it matters more in Minneapolis, MN than in most places. Before finishing a basement, you'll need moisture tests before finishing and prevention steps must run before a single stud goes up, or before you build on framing someone else left behind. Our heavy clay soil holds water against foundation walls, spring snowmelt pushes moisture through porous concrete, and winter temperature swings create condensation on cold walls. Generic finishing guides written for sandy-soil states skip all of this. This checklist walks you through the steps to assess and prevent moisture damage before a single stud goes up.
This guide is written for the decision stage. You already know you want a finished basement. The question is what has to happen first so the drywall, flooring, and basement bathroom you pay for do not get ruined by water you could have caught for the cost of some plastic sheeting and a weekend.
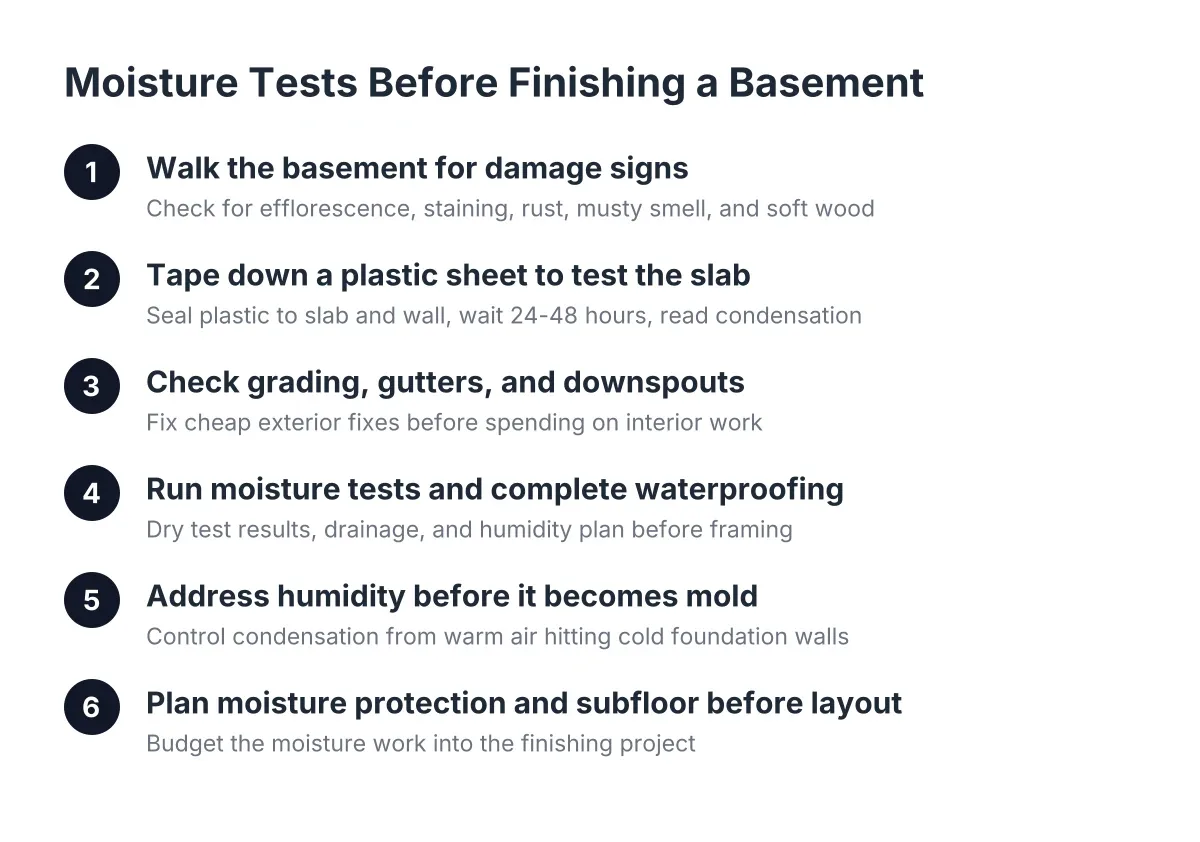
Step 1: Walk the Basement and Read the Signs of Water Damage
Start with your eyes and nose before any tools. Minneapolis basements leave clear evidence when moisture has been moving through the walls or slab, and you can spot most of it in twenty minutes with a flashlight.
Look for these signs of basement water damage:
- White, chalky streaks on concrete walls (efflorescence, which means water is carrying minerals through the wall)
- Dark staining or a tide line along the bottom of the walls or around the slab edges
- Rust on the bottom of the furnace, water heater, or steel support posts
- Musty smell, especially after rain or during spring melt
- Peeling paint or bubbling on previously coated walls
- Damp or discolored wood on any existing framing near the floor
If you bought a house with a half-finished basement, pull back insulation and check the bottom plates of the existing walls. Press a screwdriver into the wood near the concrete. Soft or dark wood means moisture got in, and that framing may need to come out regardless of how straight it looks.
Step 2: Tape Down a Plastic Sheet to Test the Slab
The plastic sheet test tells you whether moisture is coming up through your concrete floor, and it costs under five dollars. Tape a two-foot square of clear plastic sheeting to the slab with all four edges sealed tight. Do the same on a below-grade wall. Wait 24 to 48 hours.
Then read the results. Condensation on the underside of the plastic means moisture is migrating up through the slab from the soil below. Moisture on top of the plastic means humid basement air is condensing on cold concrete, which is a humidity problem rather than a seepage problem. Those two problems have different fixes, so knowing which one you have saves money.
Run this test in spring if you can. A Minneapolis slab that tests dry in a February cold snap can test wet in April when the clay around your foundation is saturated with snowmelt.
Step 3: Check Grading, Gutters, and Downspouts Outside
Most basement water problems start outside, not inside. Before you spend anything on interior work, walk the perimeter of the house after a rain and watch where the water goes.
Fix the cheap stuff first:
- Downspouts should discharge at least six feet from the foundation, farther if the yard slopes back toward the house
- Soil should slope away from the foundation, dropping about six inches over the first ten feet
- Clean gutters so water does not sheet over the edge and dump next to the wall
- Check window wells for standing water or clogged drains
Minneapolis clay makes this step matter more than it would elsewhere. Clay drains slowly, so water that pools near the foundation sits there and keeps pressing against the wall for days. Correcting grade and extending downspouts solves a large share of chronic seepage before anyone talks about membranes or drain tile.
Step 4: Run Moisture Tests and Complete Waterproofing Before Finishing
What does basement waterproofing require when moisture tests and prevention steps are part of the plan before finishing? At minimum, it requires a dry test result on the slab and walls, working exterior drainage, and a plan for humidity control. If your tests showed active seepage, it also requires fixing the water path itself, through sealing, interior drain tile, or a sump system, before framing and insulation go in.
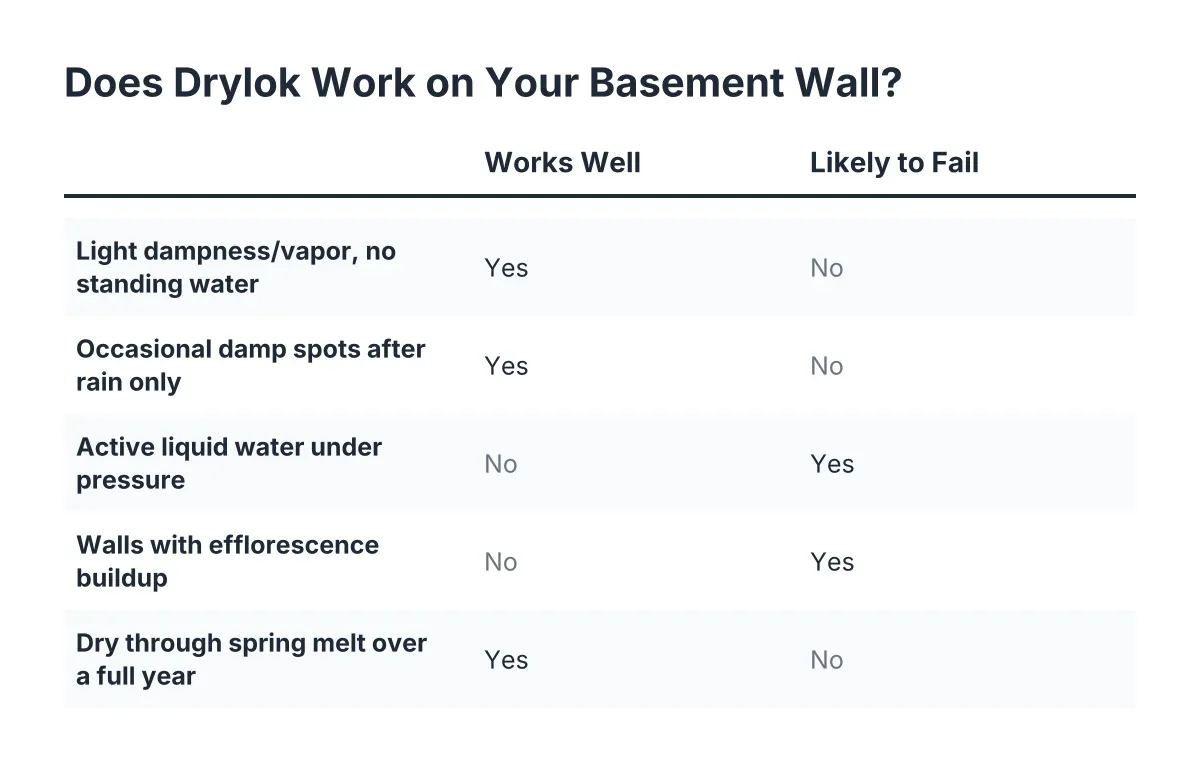
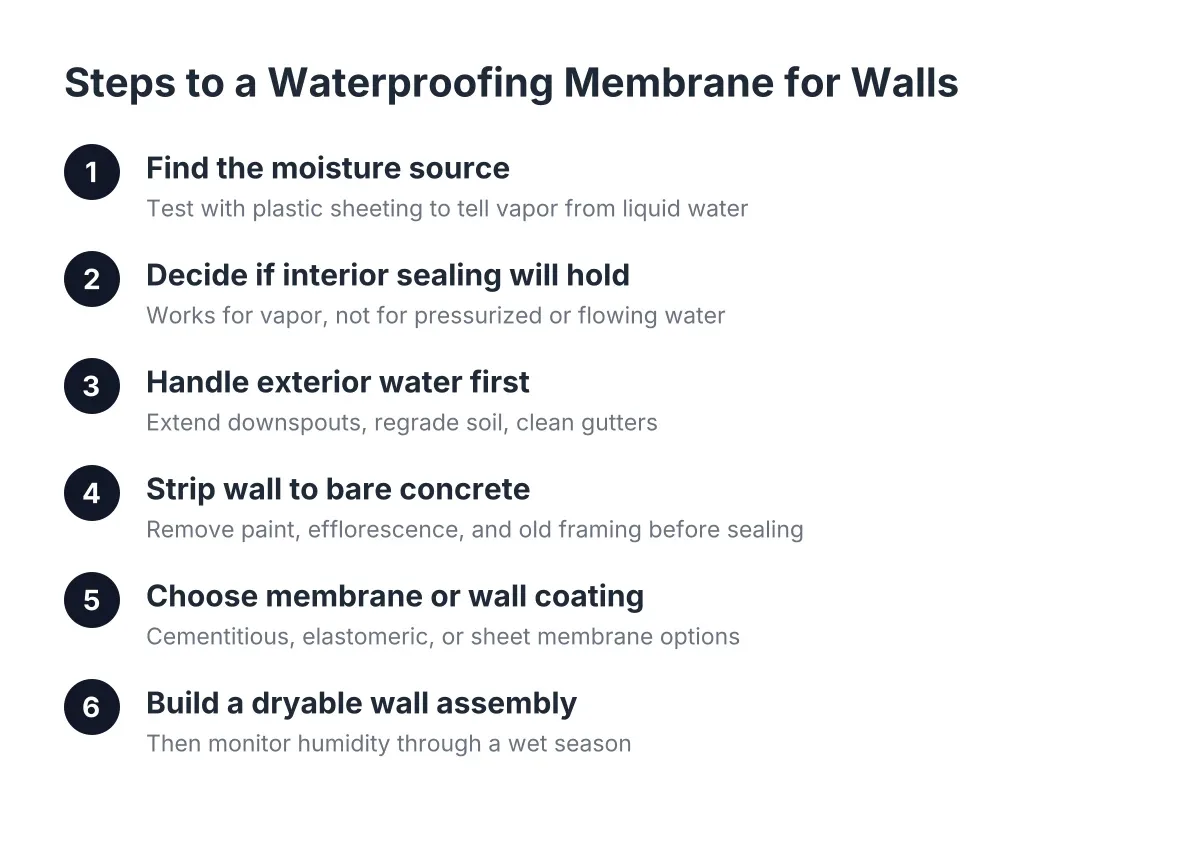
Here is the decision logic in plain terms. If the plastic test showed vapor from the slab but no liquid water, a sealed subfloor system and a dehumidifier may be enough. If water enters at the wall-floor joint during heavy rain, you are looking at interior drain tile routed to a sump basket, and interior basement waterproofing contractors handle that work before the finishing crew starts. Additionally, if walls weep through cracks, those cracks get repaired and the wall gets a membrane or sealer rated for below-grade concrete.
The order matters. Moisture and drainage problems must be solved before insulation goes in, because insulating over a wet wall hides the problem while the framing behind it rots. A contractor who quotes you drywall without asking about moisture history is skipping the step that protects everything else you are buying.
This is also where a half-finished basement gets its honest assessment. Suppose you bought a house where the previous owner framed three walls, then stopped. If the framing sits tight against damp concrete with no vapor retarder behind it, parts of it likely need to come out; dry, properly spaced framing can often stay. The moisture tests from Steps 1 and 2 give you evidence, not a sales pitch, for that call.
Step 5: Address Humidity Before It Becomes Mold
Basement humidity control is the half of basement moisture control that homeowners skip, and it causes as much damage as leaks. Warm interior air hitting a cold Minneapolis foundation wall condenses, and that water feeds mold inside a finished wall cavity where you cannot see it.
Buy a cheap hygrometer and track your basement humidity for a few weeks. Keep it below 50 percent, which usually means running a dehumidifier from spring through fall. In addition, plan the wall assembly so it can dry: insulation against the concrete should be air impermeable, and the assembly should never trap moisture between two vapor-tight layers. A sheet of poly stapled over fiberglass on the interior side of a basement stud wall is a common DIY mistake, because any moisture that gets into that cavity has no way out.
Air sealing matters more than most people expect. Air leaking into a wall cavity carries far more moisture than vapor passing through materials, so sealing rim joists and penetrations does more for the wall than chasing the perfect paint.
Step 6: Plan Moisture Protection and the Subfloor Before Layout
Once tests come back dry or the fixes are done, build moisture protection into the finishing plan itself. A vapor barrier under a concrete slab blocks moisture from the ground into the concrete above it, according to W. R. Meadows. Many older Minneapolis homes were poured without one, which is why the slab test in Step 2 matters so much.
You cannot add a barrier under an existing slab, but you can add a dimpled subfloor panel on top of it. The panel lifts the finished floor slightly off the concrete, giving vapor a path to migrate and escape instead of soaking into carpet pad or laminate. Even a basement that tested dry benefits from a subfloor, because it protects the finished floor from a future water event like a water heater failure.
If your home has a sump pump, test it before finishing starts and consider a battery backup. A finished basement raises the stakes on a pump failure during a June thunderstorm. If drain tile and a sump are part of the fix, that trenching happens before framing, which is why sump work and basement finishing get planned together rather than in sequence by two companies that never talk.
Step 7: Budget the Moisture Work Into the Finishing Project
Moisture prevention is a line item, not an afterthought, so put it in the budget before you commit to a layout. According to Angi, an average basement remodel runs $30 to $75 per square foot. Waterproofing scope sits on top of that, and it ranges from a few hundred dollars for grading and sealant to five figures for full interior drain tile and a sump system.
The return justifies the care. The National Association of Realtors Remodeling Impact Report found homeowners recover 64 percent of basement finishing costs at sale, one of the highest figures among 20 projects studied. The same report gave basement finishing a joy score of 9.5 out of 10. A moldy finished basement delivers neither number; a dry one delivers both.
For example, say a Minneapolis homeowner is rescuing a 900 square foot basement the previous owner framed and abandoned. In that hypothetical scenario, the plastic test shows slab vapor, two bottom plates are soft, and the downspouts dump next to the foundation. The moisture fix might be downspout extensions, replacing two wall sections, a sealed subfloor, and a dehumidifier, an illustrative $3,000 to $6,000 before finishing resumes. That is a fraction of redoing water-damaged drywall and flooring in year three.
Where Waterproofing Fits in the Minneapolis Finishing Timeline
For homeowners in Minneapolis, MN, the sequence looks like this: moisture tests before finishing occur first, then exterior drainage fixes, any interior waterproofing or sump work, then permits, framing, rough-in inspections, insulation inspection, and finishes. Basement waterproofing before finishing is not a separate project; it is the first phase of the same project, and it is the phase that decides whether everything after it lasts.
Two honest caveats. First, a plastic sheet test and a visual walk-through catch most problems, but active structural cracks, bowing walls, or chronic flooding call for a professional evaluation before anyone finishes anything. Second, if you are searching for interior basement waterproofing near me alongside finishing quotes, favor contractors who want to see your moisture test results and talk through the whole sequence, not just the drywall. A local basement finishing contractor who knows Minneapolis clay, codes, and spring melt will ask about water before asking about paint colors. That is the order that protects your money.
If you need basement finishing, Minneapolis Basement Finishing Pros can help.
Prefer to talk it through? Call (651) 758-8806 — a quick call is usually the fastest way to get a straight answer for your situation.