Basement Waterproofing Membrane Installation Cost in Minneapolis: Materials and Labor
If your unfinished basement smells musty, shows a white chalky line on the concrete, or took on water during a spring thaw, you are right to pause before finishing it. In Minneapolis, the cost of basement waterproofing membrane installation depends on two things most generic guides skip: our heavy clay soil, and whether the membrane goes on the inside or the outside of your foundation. This guide walks through the real cost drivers, step by step, so you can budget the moisture fix before you budget the playroom.
One thing up front. Finishing over a damp basement is the most expensive mistake a first-time basement finisher can make. Drywall, carpet, and framing hide moisture until mold forces you to tear it all out. Solve the water first. Then finish.
Step 1: Confirm You Actually Have a Moisture Problem
Before you price anything, figure out what the water is doing. Minneapolis sits on clay-heavy soil that holds water against foundations like a wet sponge. When that clay freezes, thaws, and swells through our long winters, it pushes moisture through block and poured concrete walls under pressure. That is why a basement that stays dry all summer can weep in March.
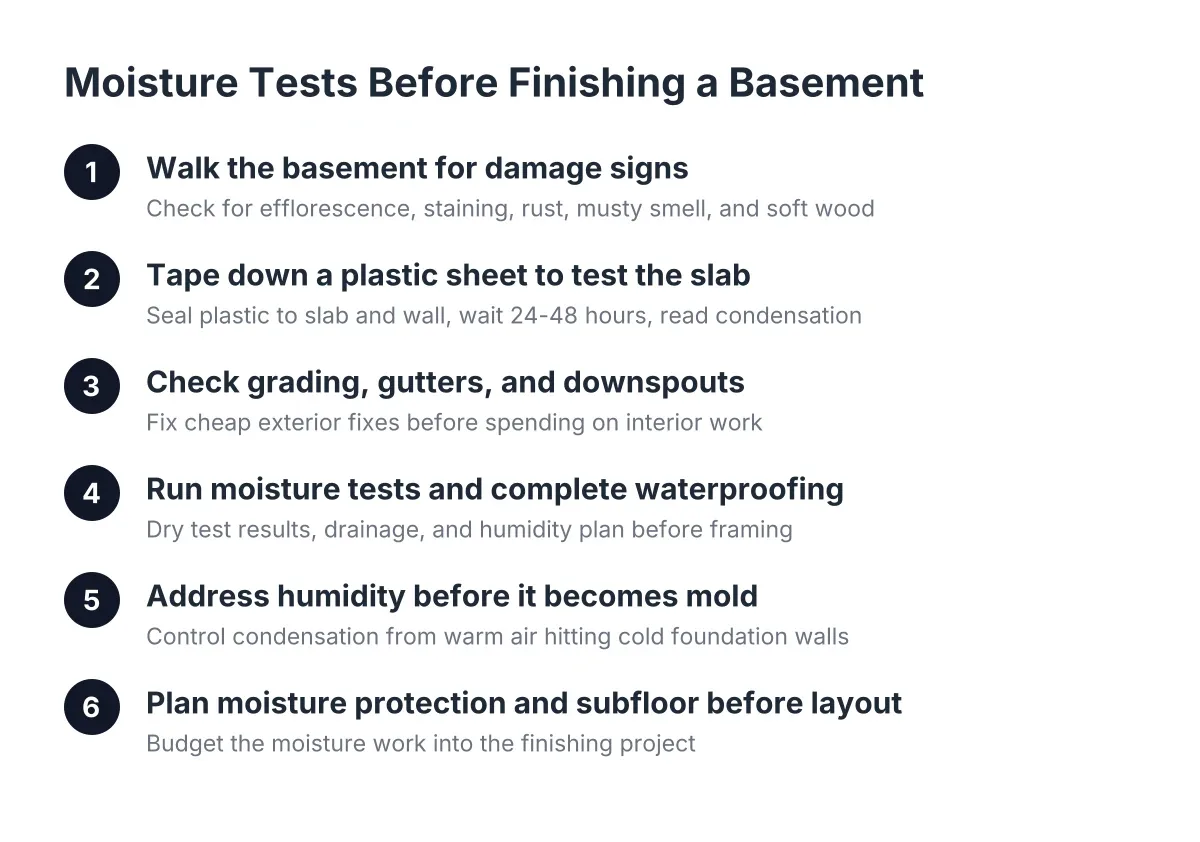
Look for these signs of basement water damage before you call anyone:
- White, powdery streaks on the concrete (efflorescence, which means water is moving through the wall)
- A musty smell that gets stronger after rain or snowmelt
- Damp spots at the base of the walls or along the floor-wall joint
- Rust on the furnace legs, water heater base, or support posts
- Peeling paint or flaking concrete on the walls
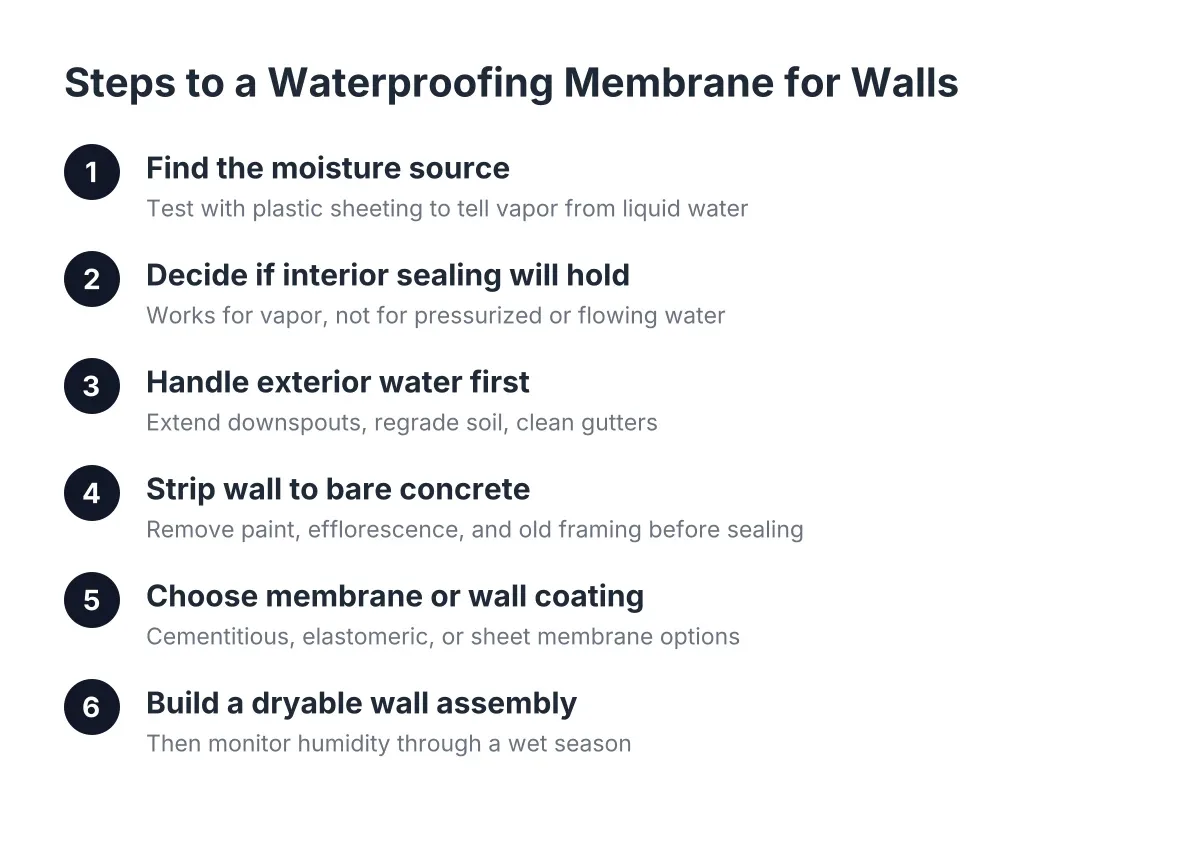
A cheap test helps here. Tape a two-foot square of plastic sheeting to the concrete wall and leave it for 48 hours. Condensation on the room side means a humidity problem, which a dehumidifier may handle. Moisture trapped behind the plastic means water is coming through the wall, and that is where a membrane earns its keep.
Step 2: Decide Between Interior and Exterior Membrane Installation
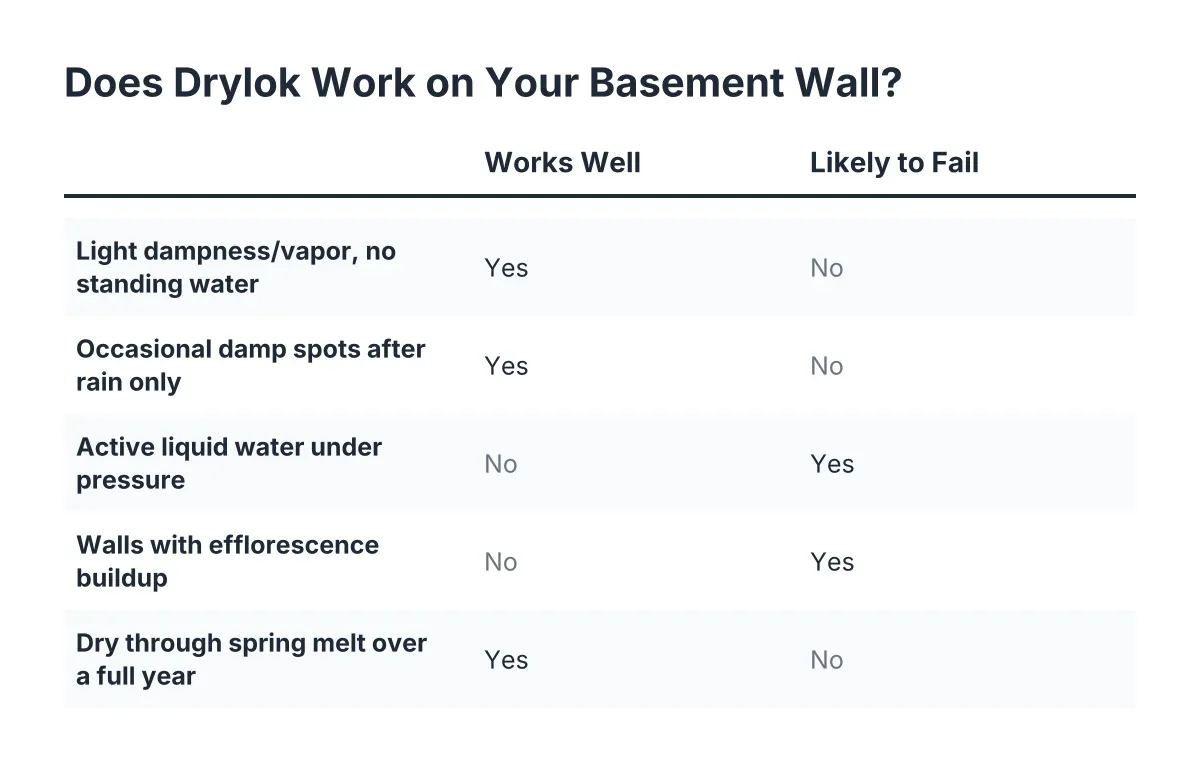
Interior and exterior membranes solve the same problem from opposite sides, and the price gap between them is large. An exterior membrane stops water before it touches the foundation. An interior system manages water after it gets through, directing it to a drain and sump pump instead of your new flooring.
Exterior work means excavating down to the footing, cleaning the wall, and applying a membrane such as a dimpled drainage mat or a peel-and-stick sheet. Waterproofing basement walls from outside is the more complete fix, but digging eight feet down through Minneapolis clay, around gas lines, decks, and landscaping, is what makes it expensive.
Interior membrane installation skips the excavation. A dimpled membrane goes on the inside face of the wall or under a subfloor panel, channeling any moisture down to a perimeter drain. It will not stop water from entering the concrete, but it keeps that water away from framing, insulation, and flooring. For a basement you plan to finish, that is often the practical goal.
As a rule of thumb for 2026, interior systems usually land in the lower thousands for a typical Minneapolis basement, while full exterior excavation and membrane work can run two to four times that. These are illustrative ranges, not quotes; your foundation type, lot access, and water volume move the number.
Step 3: Materials and Labor for Waterproofing Membrane Installation Costs
Membrane material itself is the cheap part of this project. Dimpled polyethylene membrane, the black sheet with the egg-carton texture, typically runs a few dollars per square foot installed and far less for the material alone. Peel-and-stick rubberized asphalt sheets for exterior walls cost more per square foot but bond directly to the concrete.
Budget beyond the sheet itself. A realistic materials list includes:
- The membrane (dimpled mat or self-adhering sheet)
- Termination bar and fasteners to seal the top edge
- Sealant or primer for the concrete surface
- Drain tile and washed rock if you are adding a perimeter drain
- A sump basin and pump if the basement does not have one
That last line matters. A membrane without a working drain and sump pump just moves water around. If you are planning a finished basement, a sump pump with a battery backup is cheap insurance against a power outage during an April storm. Sump pump and basement finishing decisions should happen together, not in sequence.
Step 4: Understand What Labor Costs in Minneapolis Clay
Labor is where Minneapolis differs from the national guides. Exterior membrane work here means machine excavation through dense clay that fights every bucket load, plus hauling spoils, protecting the dig from cave-in, and backfilling with material that drains better than what came out. Expect labor to be 60 to 70 percent of an exterior job's total, as a general estimate.
Interior installation is lighter work but not trivial. Crews cut the slab edge for drain tile, set the membrane, tie it into the sump basin, and patch the concrete. Suppose a homeowner in Minneapolis has a 900-square-foot basement with seepage along two walls. In that scenario, a typical crew might trench and membrane roughly 60 linear feet over two to three days, and the labor would still outweigh the materials by a wide margin.
Season affects the schedule too. Exterior excavation in frozen ground is slow or impossible, so most outside membrane work in Minnesota runs late spring through fall. Interior work happens year-round, which is one reason many homeowners finishing a basement in winter choose the interior route.
Step 5: Fold the Waterproofing Membrane Installation Cost Into Your Basement Finishing Budget
Here is the budgeting mistake we see most often. A family gets a home equity loan approved, prices out flooring and framing, and treats waterproofing as an optional add-on. Flip that order. The membrane, drain, and sump are the foundation of the finishing budget, not a line item at the bottom.
For context, an average basement remodel costs between $30 and $75 per square foot, according to Angi. Moisture work typically adds a modest slice on top of that, and it protects everything underneath it. The National Association of Realtors Remodeling Impact Report found that 64% of basement finishing costs are recovered in a home's sale, one of the highest returns among the projects it studied. A basement that fails inspection or grows mold recovers nothing.
If your household is bursting at the seams and the basement is your path to a bedroom or family room without moving, phasing makes sense. Many first-time finishers handle waterproofing and framing in year one, then add the basement bathroom later. The membrane has to come first either way, because you cannot install it after the walls are closed.
Step 6: Pair the Membrane With the Right Wall and Floor Assembly
A membrane alone does not finish the job of basement moisture control. The wall and floor assembly over it has to let any remaining vapor escape instead of trapping it. This is where well-meaning homeowners create mold problems with good intentions.
The common mistake is stapling a plastic vapor barrier to the inside of the stud wall, the way you would upstairs. In a basement, that plastic traps moisture inside the wall cavity, where it cannot dry back into the room. Taped rigid foam board or closed-cell spray foam against the concrete does the job better: it insulates, blocks air movement, and controls vapor in one layer. According to W. R. Meadows, a vapor barrier belongs under the slab, over the base course, where it blocks ground moisture from entering the concrete above, not on the room side of a framed wall.
On the floor, a dimpled subfloor panel raised slightly off the slab gives moisture a path to migrate and dry rather than pool under your flooring. Pair that with moisture-resistant drywall instead of standard board, and the finished space can handle the humidity swings of a Minnesota year.
Step 7: Know When to Bring In a Professional
Some of this work is honest DIY territory, and some is not. Applying an interior dimpled membrane in an unfinished basement is forgiving work; a less-than-perfect cosmetic result disappears behind the finished wall as long as the installation stays watertight. Cutting a slab for drain tile, excavating a foundation, or tying into a sump system is a different class of job, and mistakes there are buried where you cannot see them fail.
Get a professional opinion if you see active water entry, horizontal foundation cracks, or bowing walls; those can signal structural pressure from the clay, not just moisture. Also note that permits and inspections apply once you move into finishing work in Minneapolis, so plan the waterproofing scope with the full project in mind rather than piecemeal.
The straight answer on cost is this: for basement waterproofing membrane installation in Minneapolis, the material is cheap, the labor and excavation are not, and the interior-versus-exterior decision drives most of the price. Settle the water question first, get the number in writing, and then enjoy planning the part your kids actually care about, the playroom.
If you need basement finishing, Minneapolis Basement Finishing Pros can help.
Prefer to talk it through? Call (651) 758-8806 — a quick call is usually the fastest way to get a straight answer for your situation.